Java内存马之Servlet、Filter和Listener的开发基础
Java内存马之Servlet、Filter和Listener的开发基础
Natro92前言
看到某个题里面用了,但是还没学过,这里就系统地学习一下Java的内存马,这部分再重学一下基础,并且复习一下开发这部分。跟着调试一下里面的细节。
其中部分内容、学习路线来自于:
GitHub - W01fh4cker/LearnJavaMemshellFromZero: 【三万字原创】完全零基础从0到1掌握Java内存马
讲的真不错,推荐一下。
准备知识
Tomcat的四种容器中,Engine、Host、Context、Wrapper中关系如下。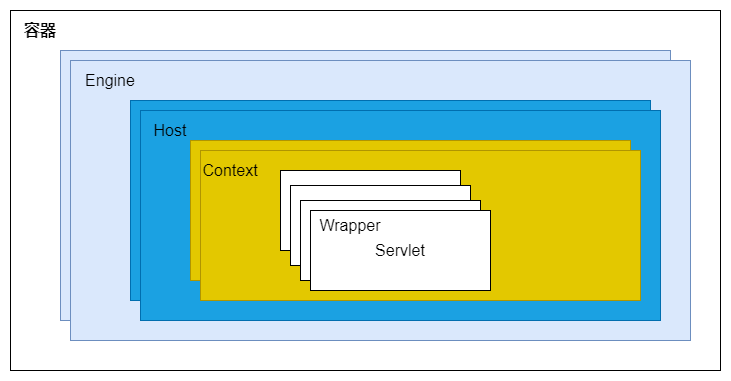
如果需要访问一个https://domain1.xx.com:8080/user/list
- 首先请求到
Tomcat服务器,Tomcat的每个连接器都监听着不同的端口。例如HTTP连接器默认监听8080端口,AJP连接器监听8009端口。因此这里被HTTP连接器接收,而HTTP连接器是属于Service组件,而有一个Service中有一个容器组件,Service中的Engine也被选中。 Service和Engine被确定了之后,Mapper(保存着容器组件和访问路径的映射)会通过url中的域名去寻找Host容器。比如这里面的domain1.xx.com对应的Host1容器。Host确定,Mapper根据url的路径匹配web应用。比如这里访问的/user找到Context1。Context确定之后,Mapper再根据web.xml配置的Servlet的路径找到Wrapper和Servlet,也就是这里的/list
这个Context拼完地出现在Java中,我对它的理解就是某个时间点的当前所在环境的一个切片,切片中存储着当时的环境变量等信息。
这个图片比较完整,可以通过这个大致了解一下。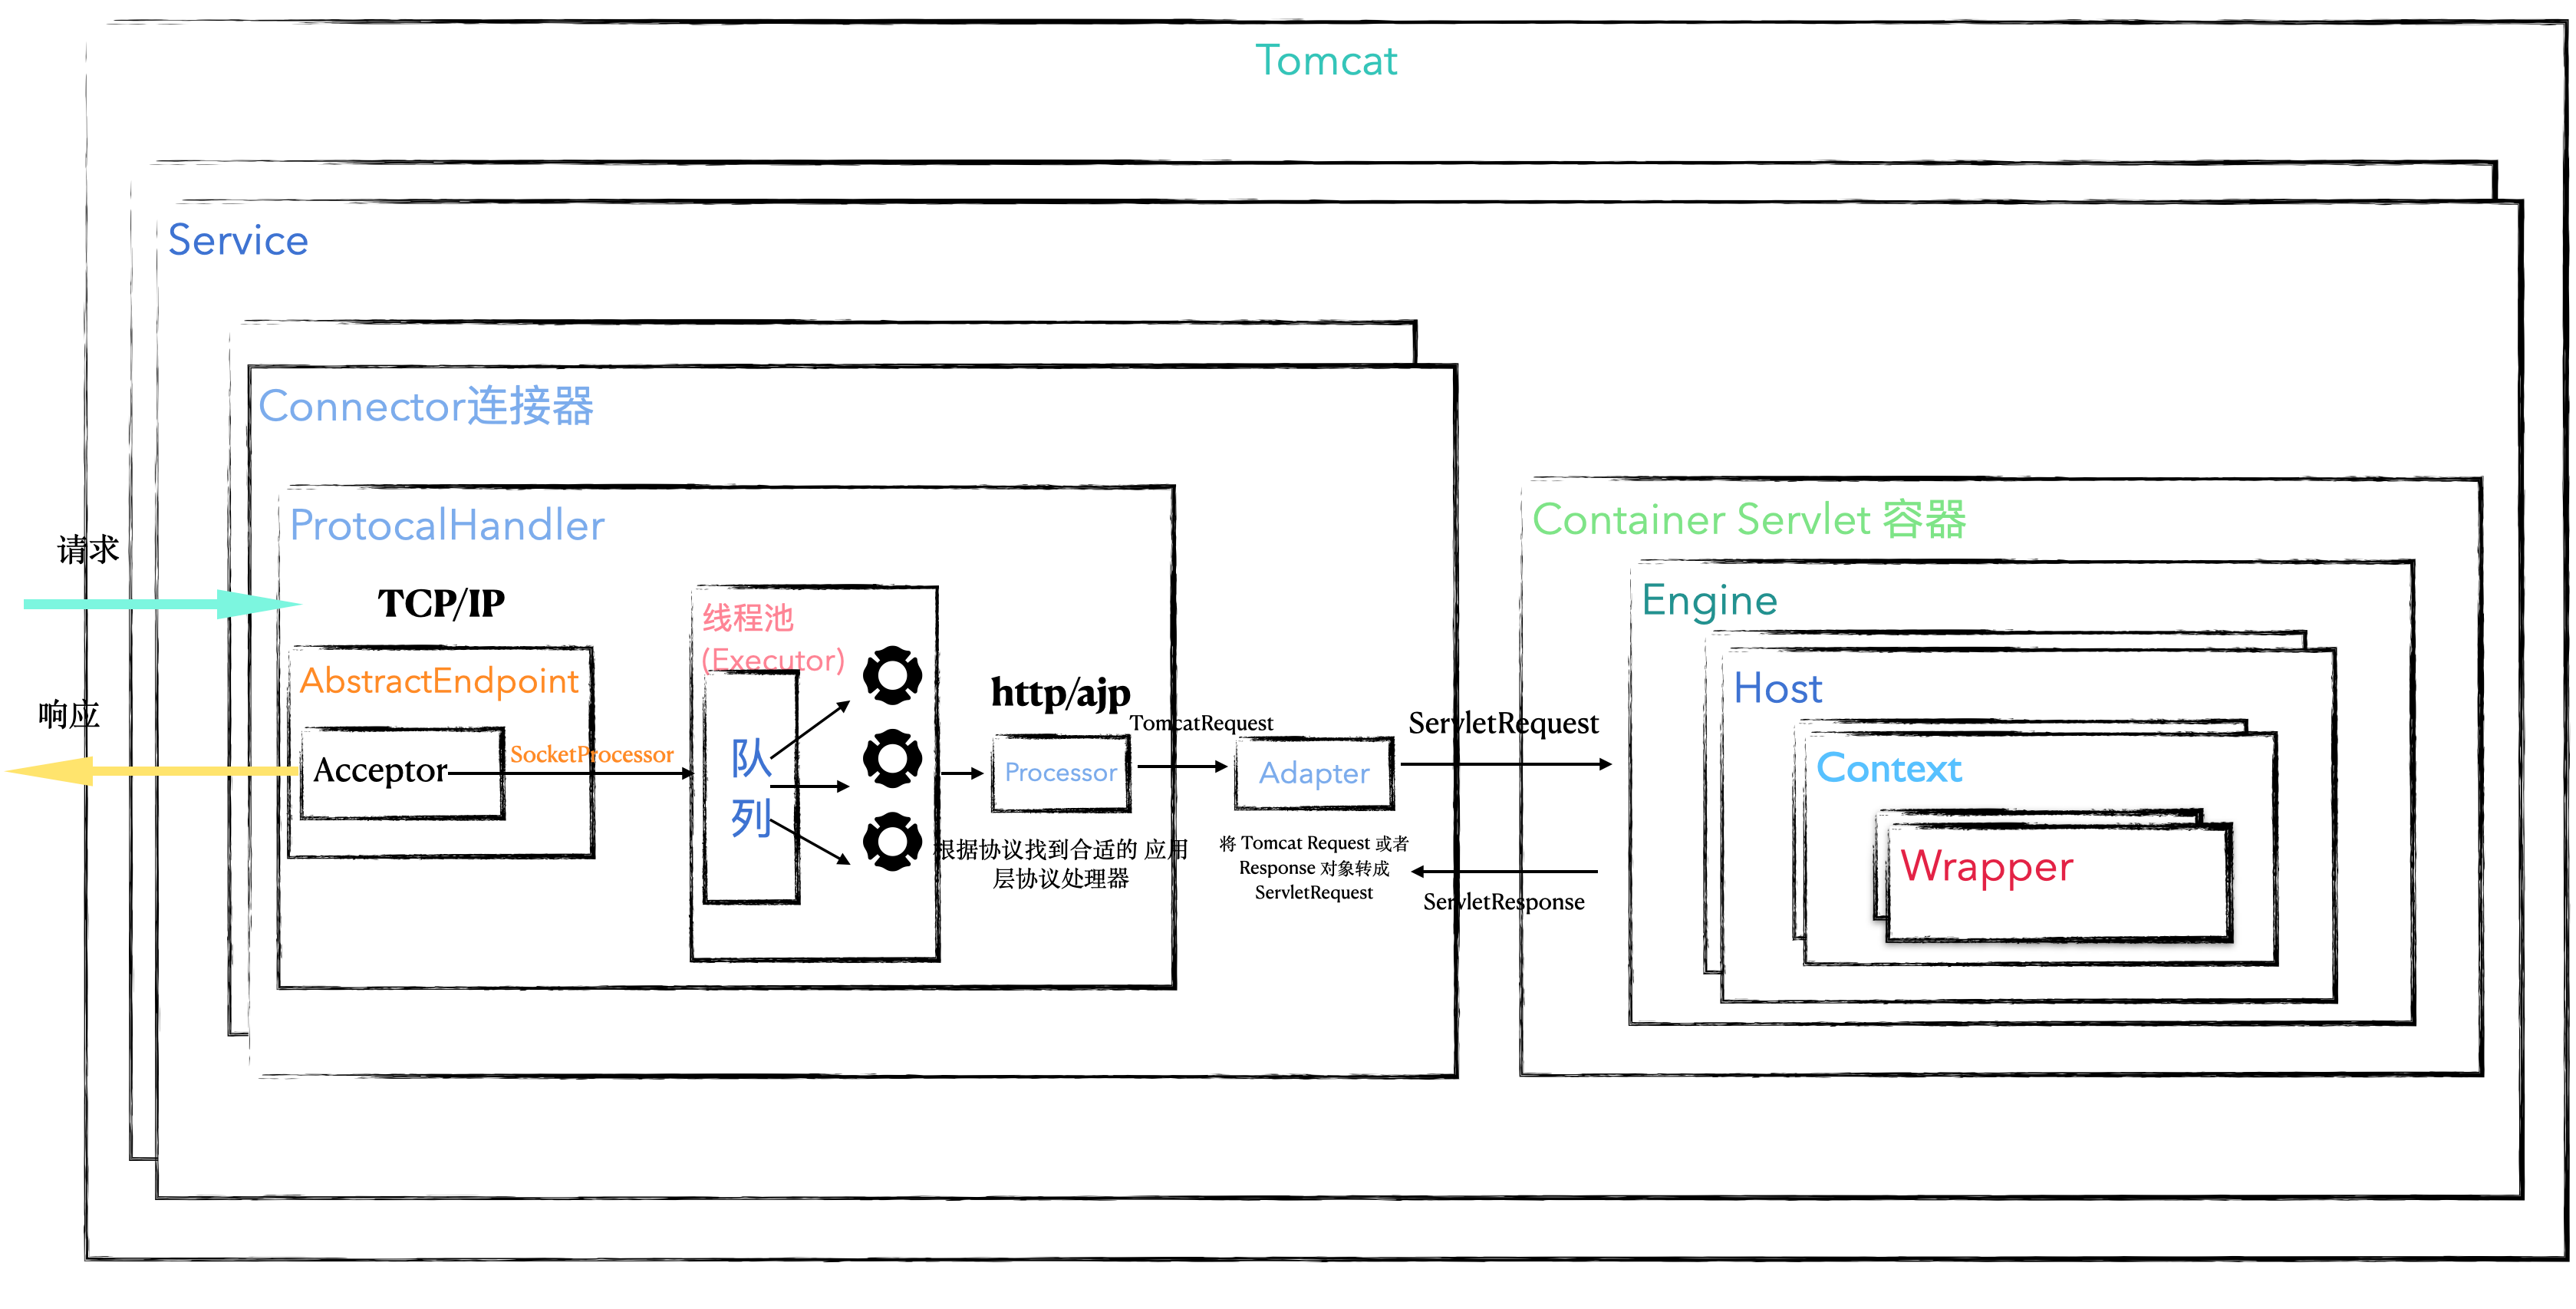
Servlet
环境配置
1 | <dependencies> |
简单Servlet组件
1 | package com.natro92; |
配置Tomcat环境: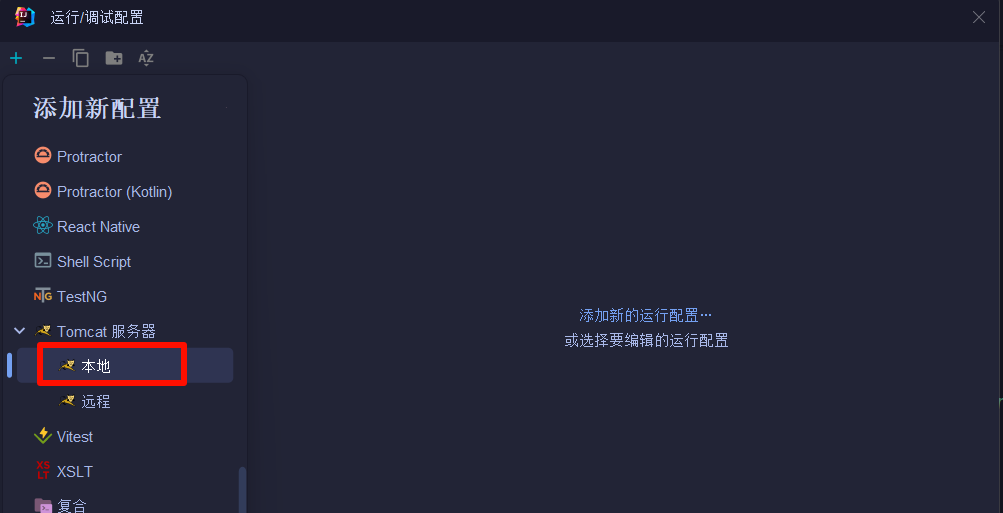
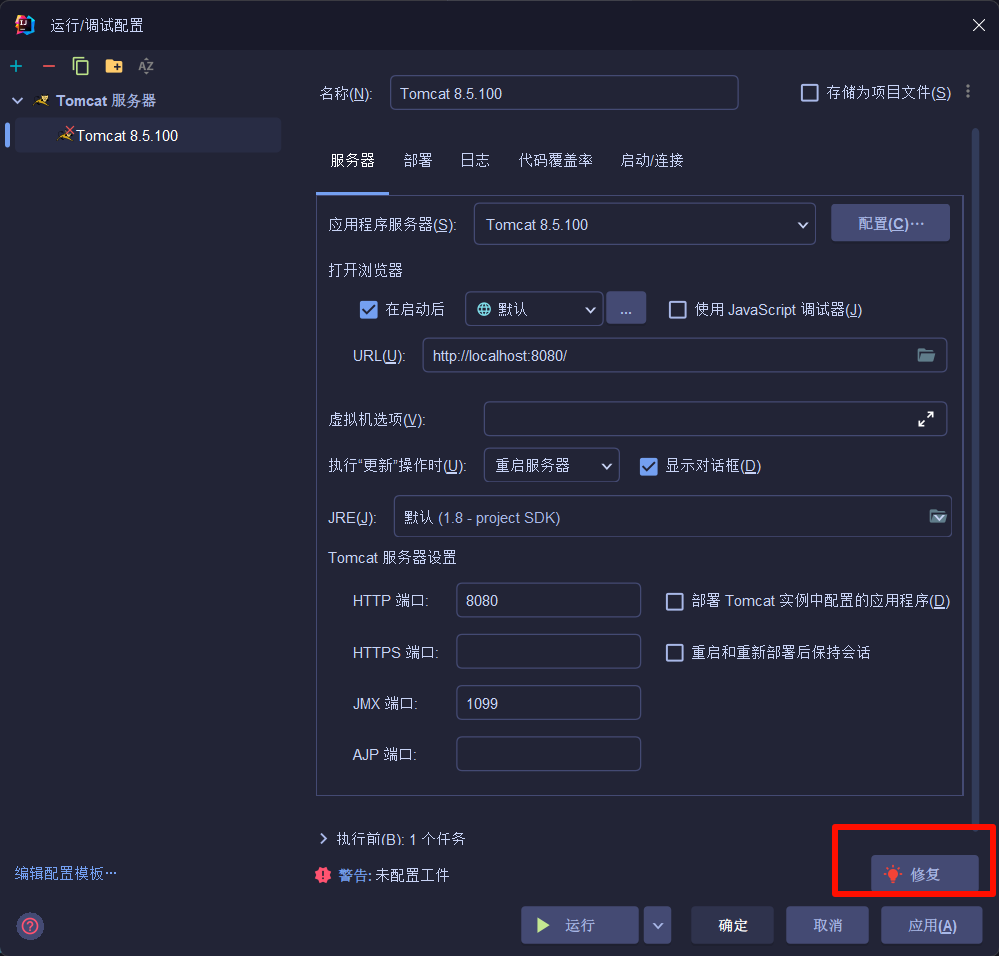
修复构建工件Web Application: Exploded展开型。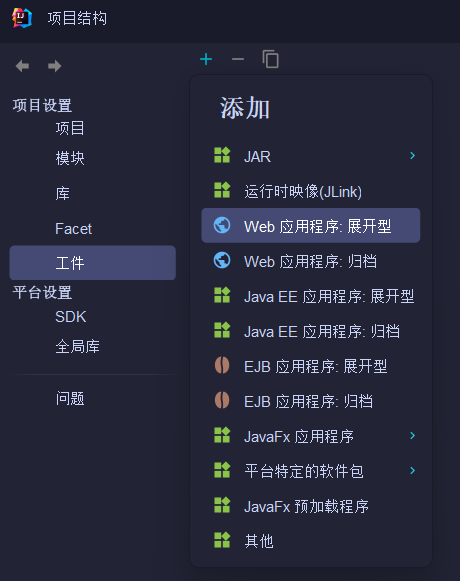
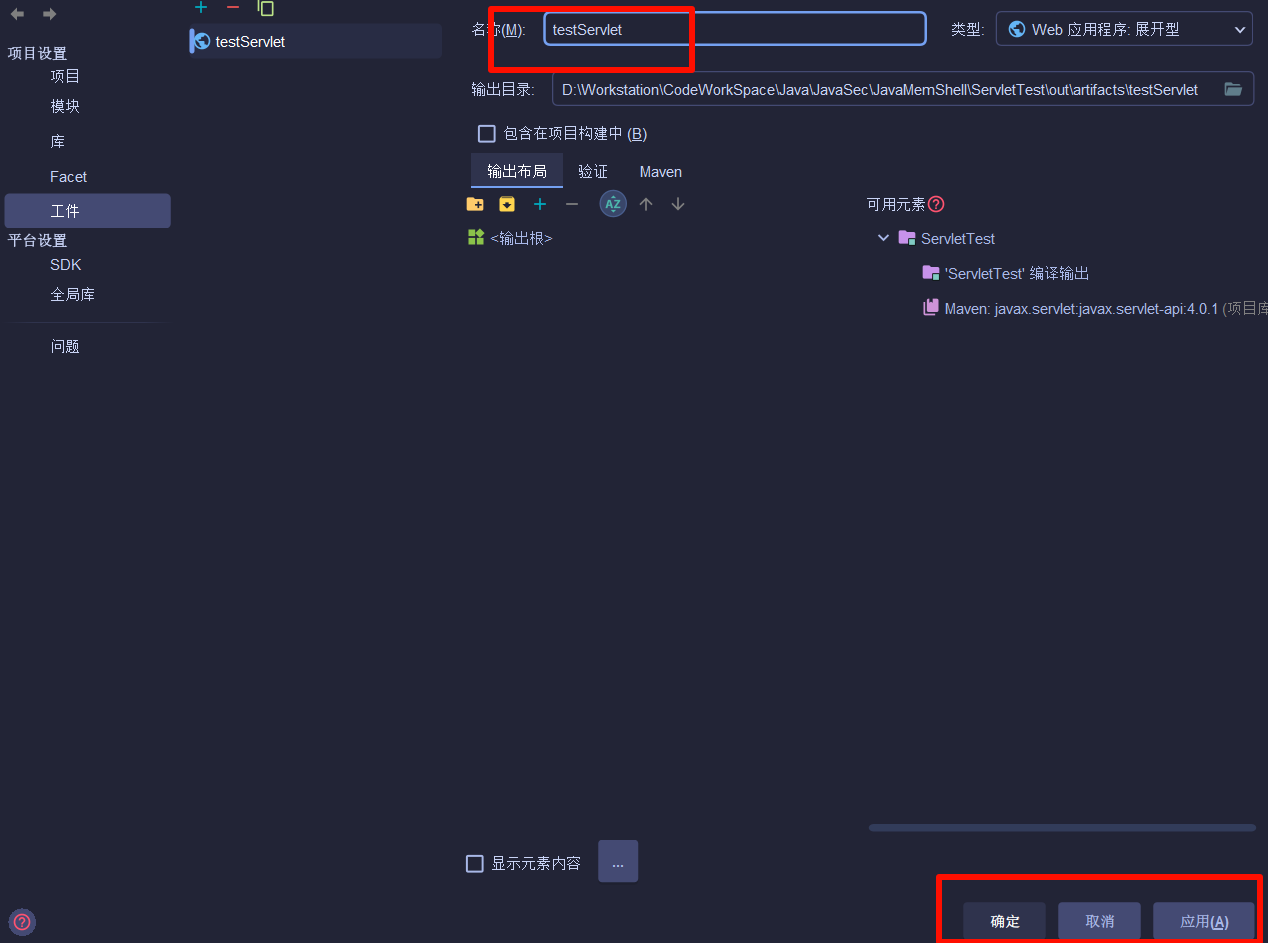
然后修改项目结构: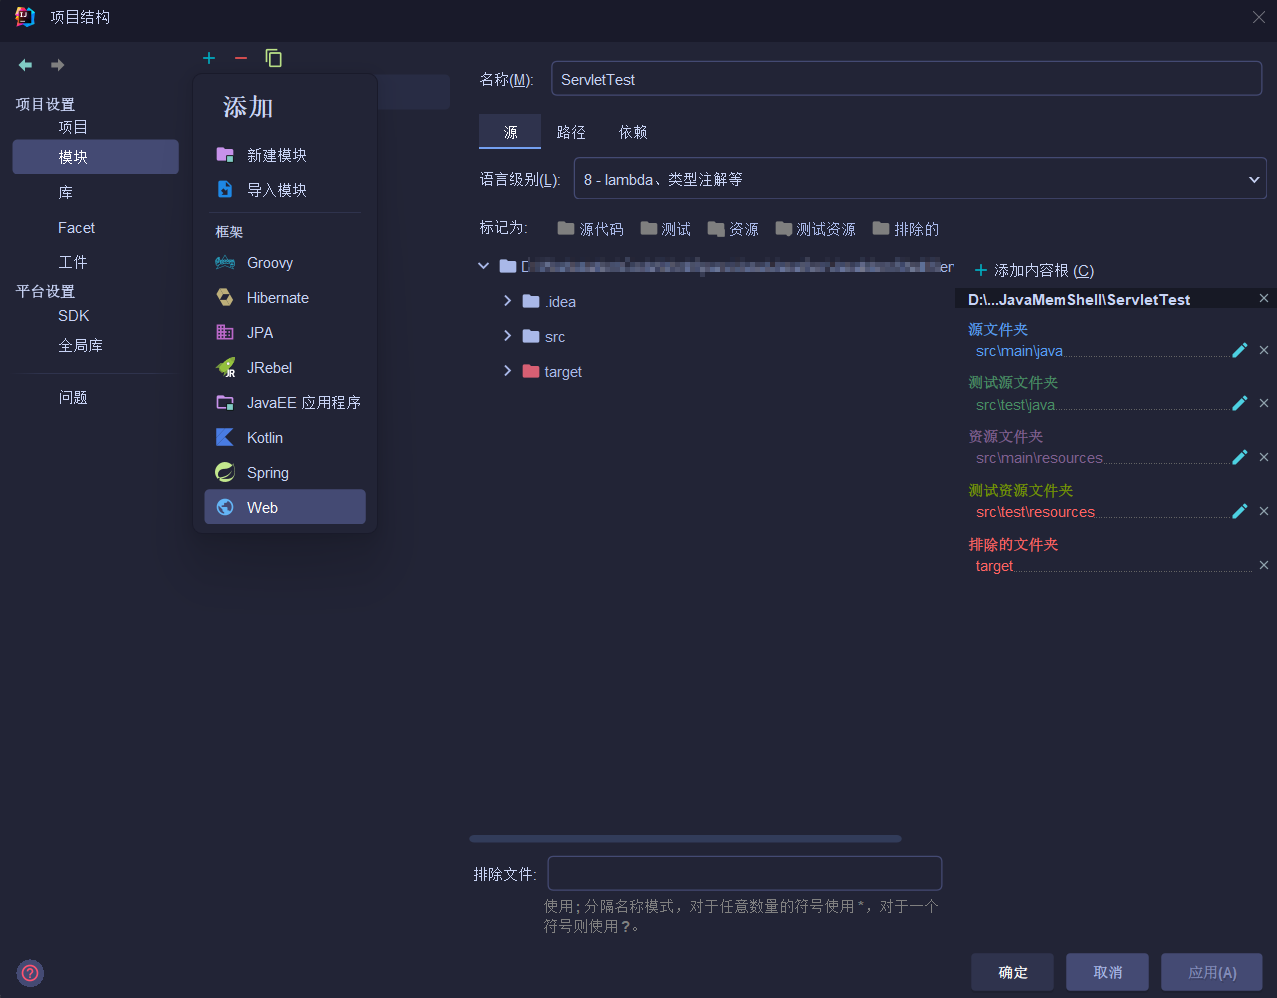

然后保存运行访问即可: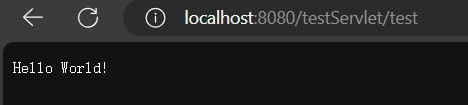
Servlet初始化和装载
环境配置
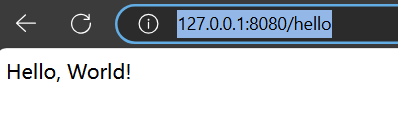
这里不用已经打包好的Tomcat,而是Tomcat的依赖,也就是tomcat-embed-core
1 | <dependencies> |
1 | package org.example; |
1 | package org.example; |
初始化流程分析
断点在org.apache.catalina.core.StandardWrapper#setServletClass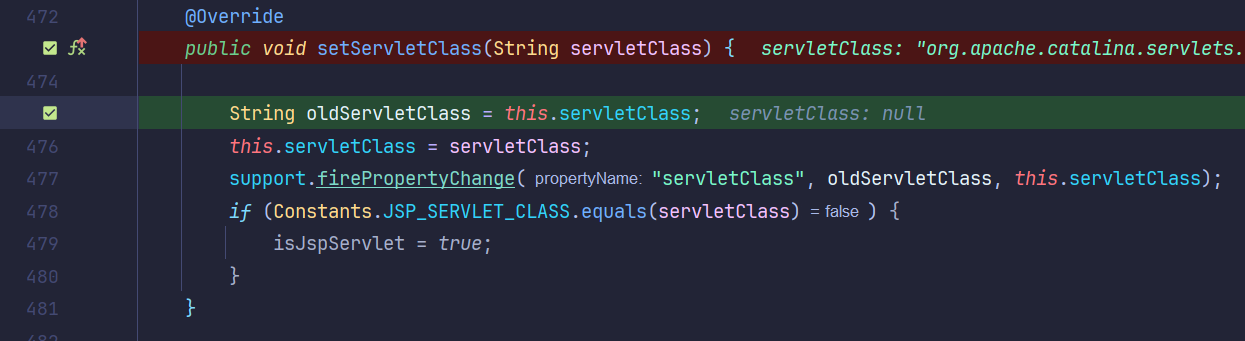
Ctrl+Alt+F7查找上层调用,其中的org.apache.catalina.startup.ContextConfig#configureContext
从1510行到1568行: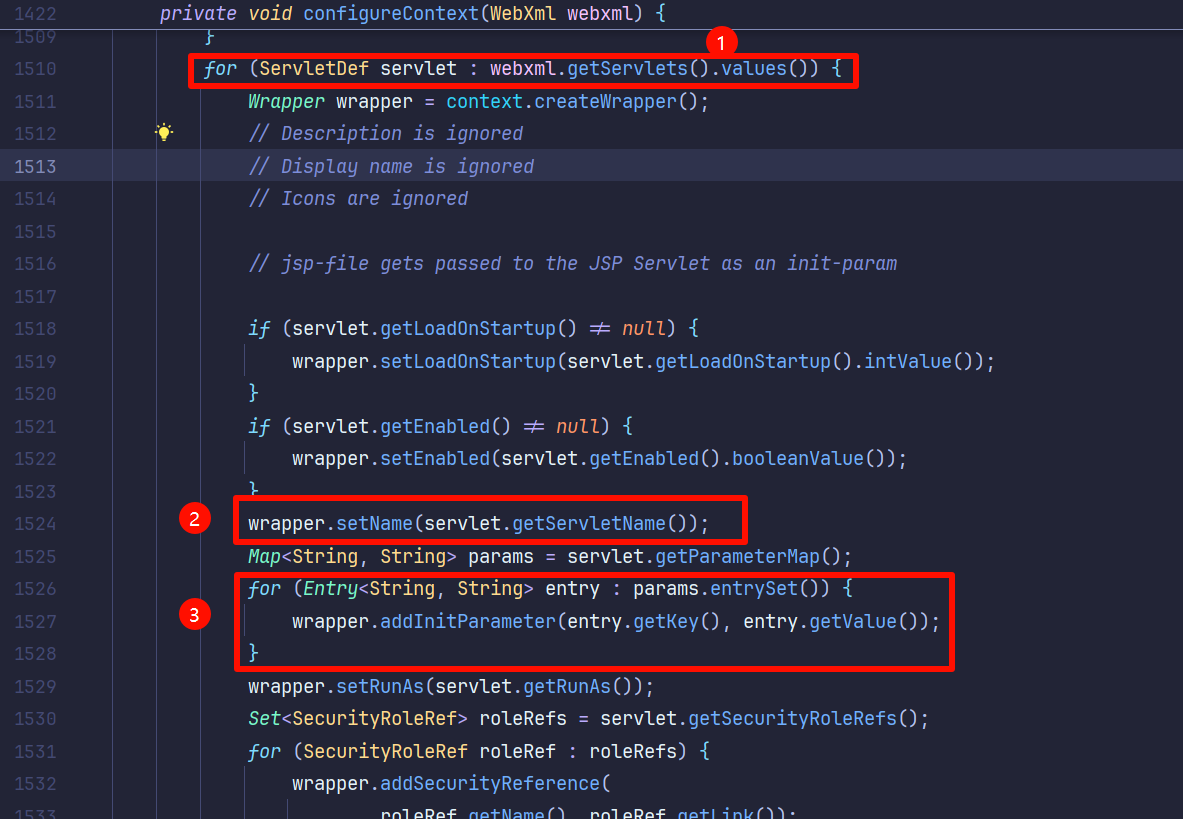
先webxml.getServlets()获取所有Servlet,创建Wrapper,判断加载顺序是否开启,设置Servlet名称。将所有参数加入Wrapper中。中间配置一些设置信息Multipartdef。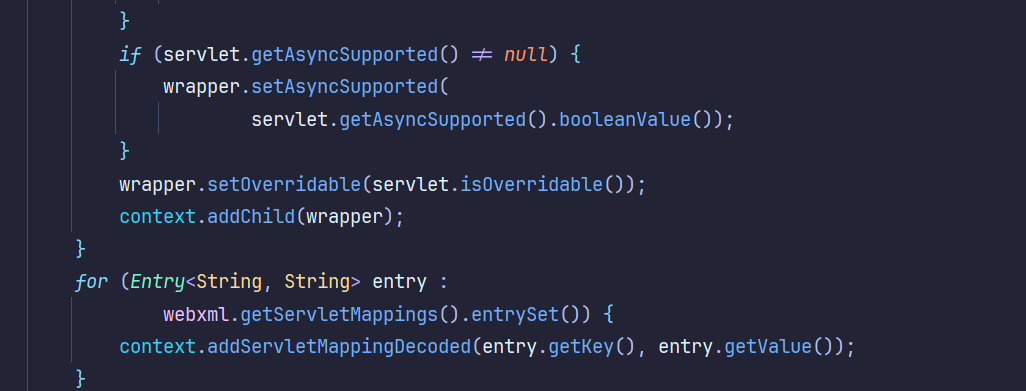
设置是否支持异步,是否重写,并且将Wrapper键入上下文。再通过循环将Servlet和url映射起来。
也就是Servlet的初始化按照下面几个步骤:
- 创建
Wrapper对象 - 设置
Servlet的LoadOnStartUp - 设置
Servlet名称 - 设置
Servlet的class - 将
Wrapper添加到Context中 - 将
Servlet和url映射加入context
装载流程分析
org.apache.catalina.core.StandardWrapper#loadServlet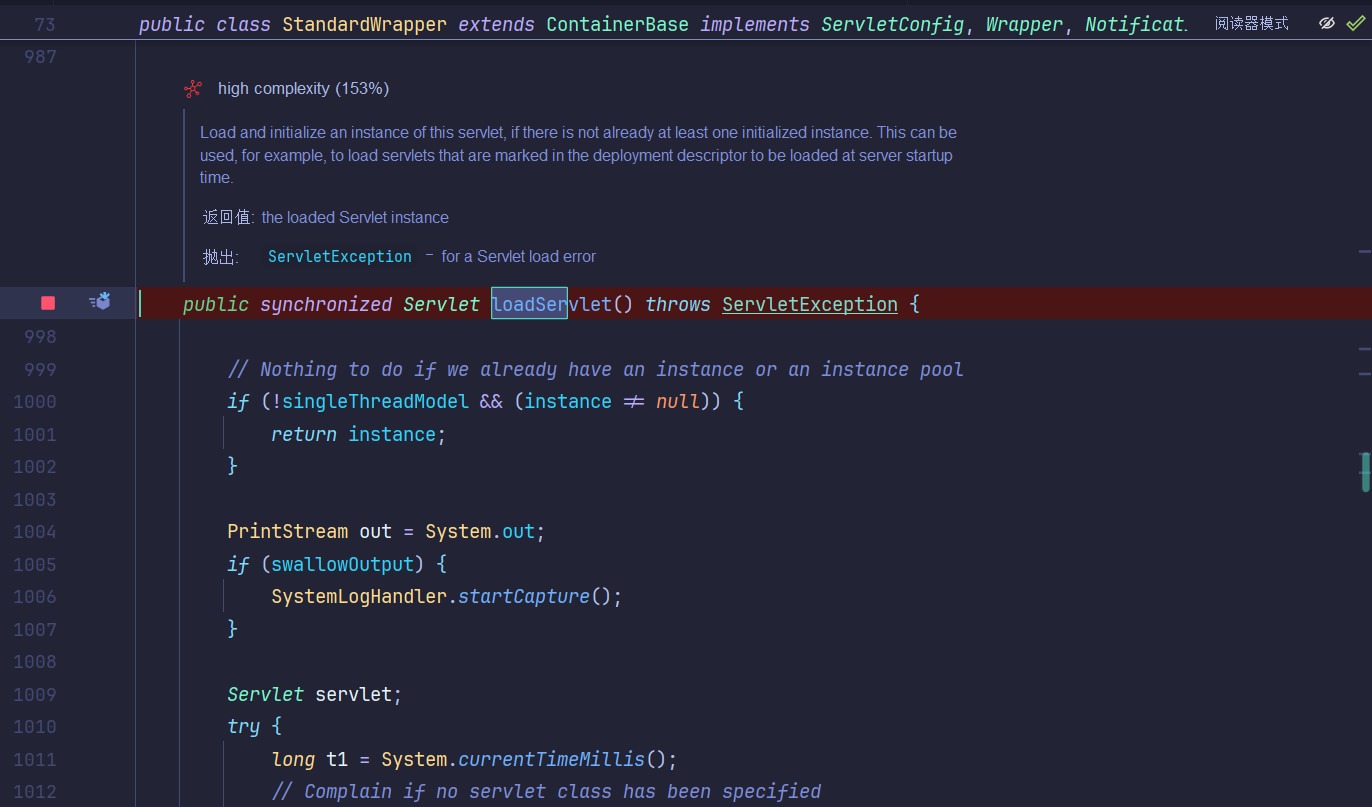
在startInternal函数中我们可以看到有其中的调用顺序: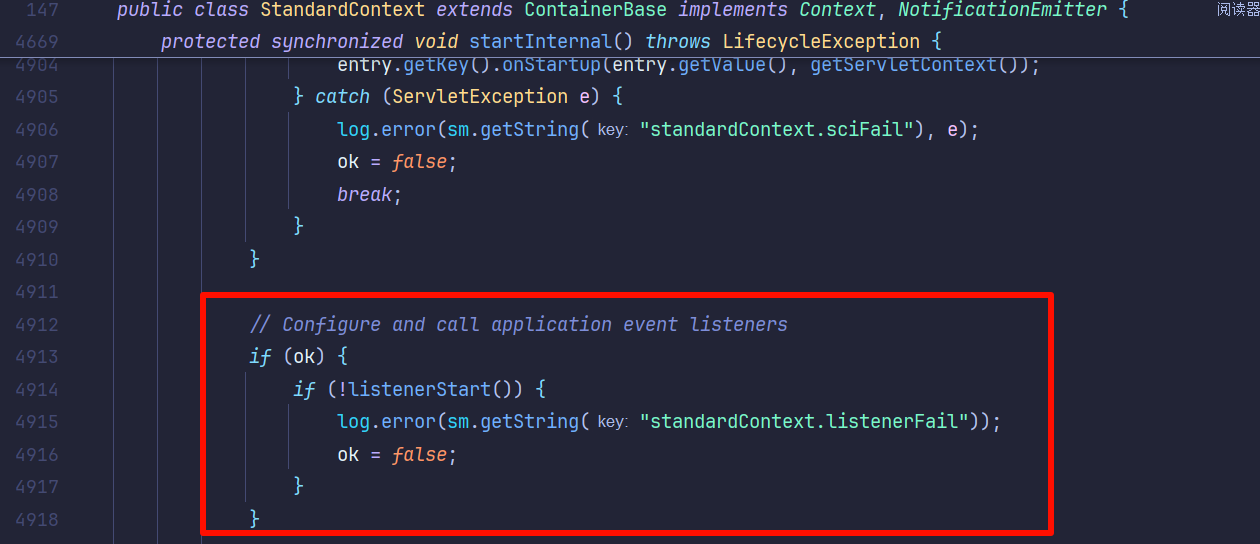
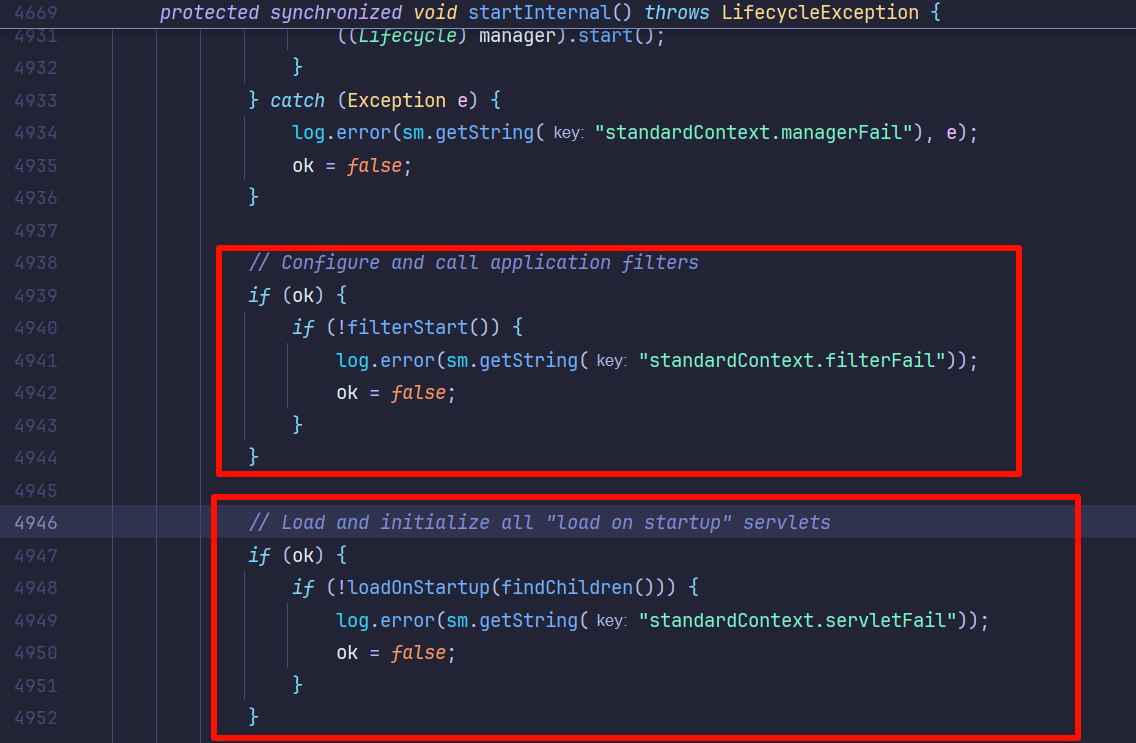
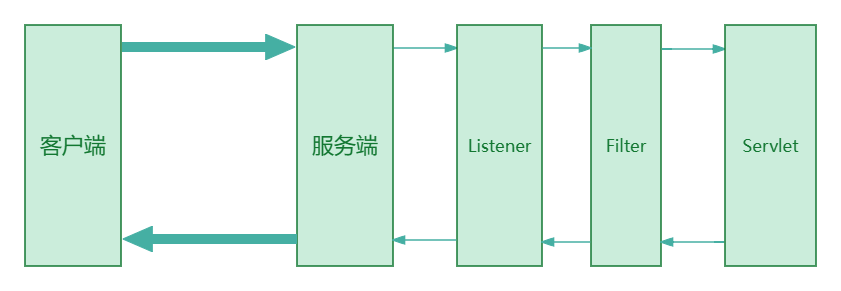
listener->filter->servlet按照这个顺序load。
这其中调用的org.apache.catalina.core.StandardContext#loadOnStartup: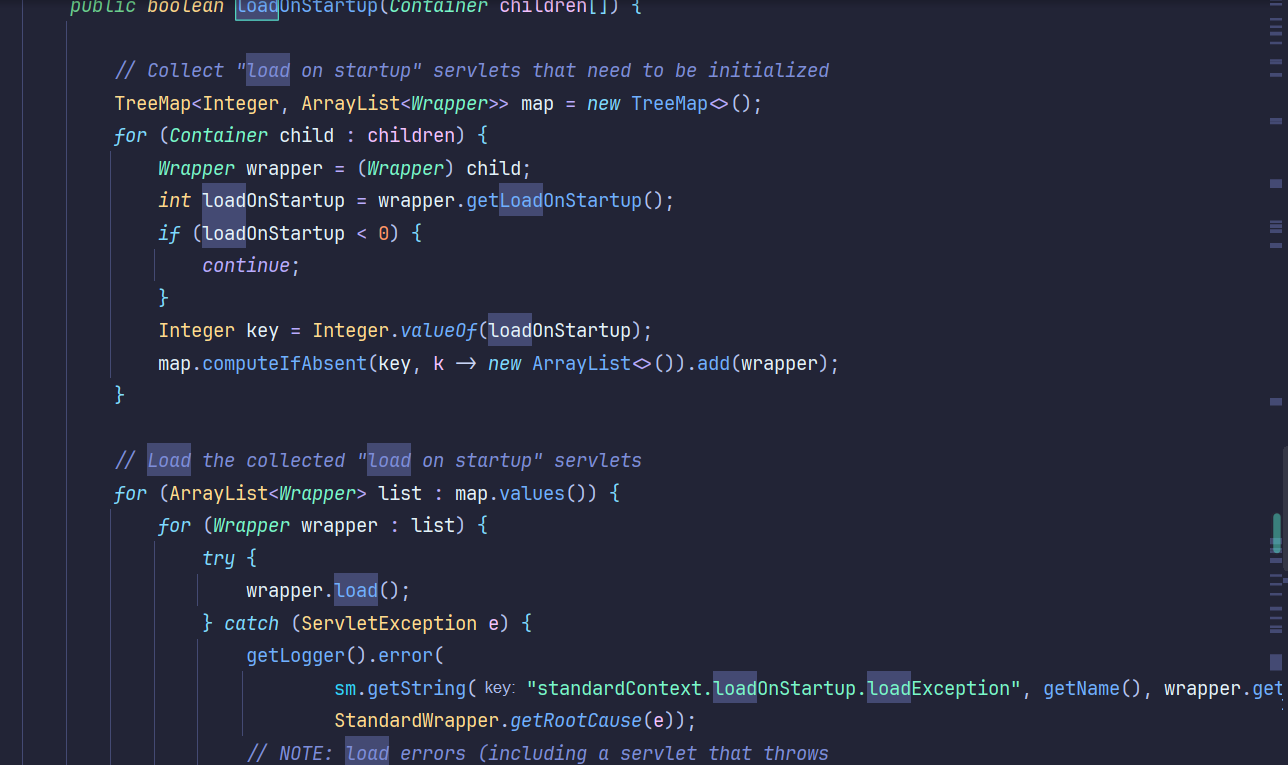
将传入的Container中的数组中的Servlet的loadOnStartUp作为键,将Wrapper存入响应列表。如果loadOnStartup是负数,则除了访问,不会加载。如果不是负数,按照loadOnStartup升序加载。
Filter
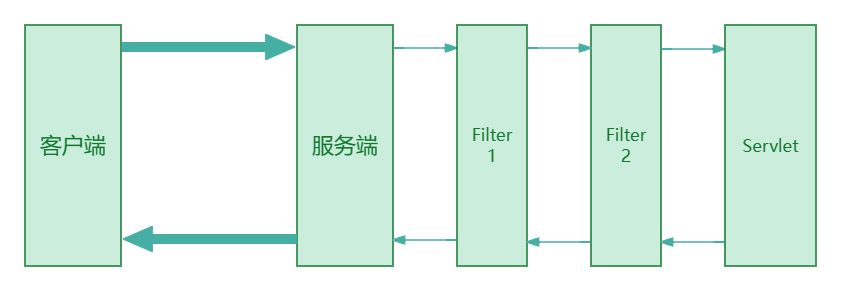
Filter 是 Servlet 规范中的一部分,它允许你对请求和响应进行预处理和后处理。Filter 就像一个过滤器,在请求到达 Servlet 之前或响应返回给客户端之前,对请求或响应进行拦截和修改。org/apache/tomcat/util/descriptor/web/FilterDef.java中能看出来,需要定义过滤器FilterDef,存放这些FilterDef的数组被称为FilterDefs,每个FilterDef定义了一个具体的过滤器,包括描述信息、名称、过滤器实例以及class等;然后是FilterDefs,它只是过滤器的抽象定义,而FilterConfigs则是这些过滤器的具体配置实例,我们可以为每个过滤器定义具体的配置参数,以满足系统的需求;紧接着是FilterMaps,它是用于将FilterConfigs映射到具体的请求路径或其他标识上,这样系统在处理请求时就能够根据请求的路径或标识找到对应的FilterConfigs,从而确定要执行的过滤器链;而FilterChain是由多个FilterConfigs组成的链式结构,它定义了过滤器的执行顺序,在处理请求时系统会按照FilterChain中的顺序依次执行每个过滤器,对请求进行过滤和处理。
简单实现
环境还是ServletTest不变,新增一个TestFilter.java
1 | package com.natro92; |
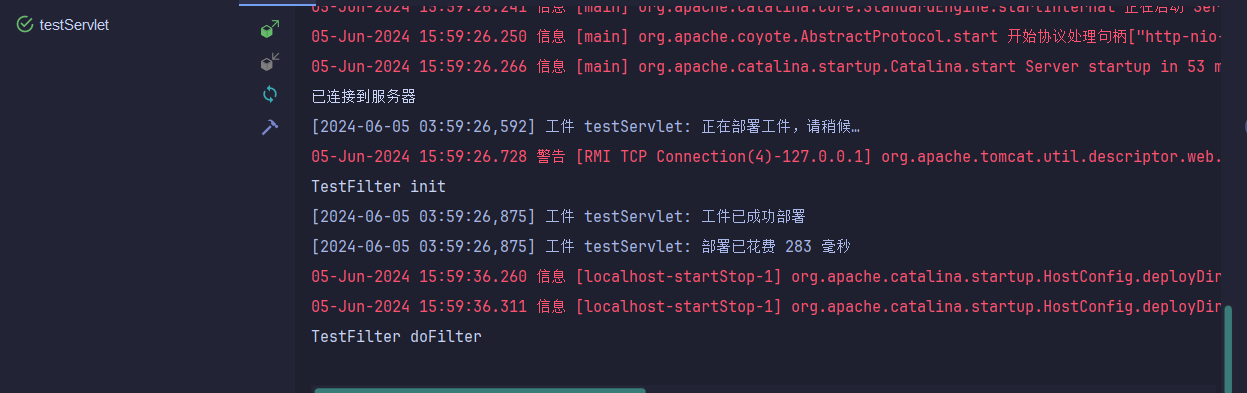
运行时就输出了初始化,而访问/test路由之后,控制台输出TestFilter doFilter部分。最后在关闭Tomcat时,出现TestFilter destroy。
PS:如果关闭之后出现报错:严重 [main] org.apache.catalina.startup.Catalina.stopServer 未配置关闭端口。通过OS信号关闭服务器。服务器未关闭。则修改Tomcat根目录/conf/web.xml中,将port改为8005即可:
即可出现销毁事件: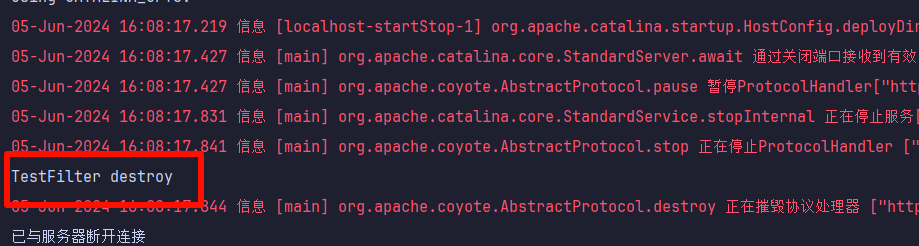
流程分析
这里需要先配置依赖:
1 | <dependency> |
从doFilter处下断点: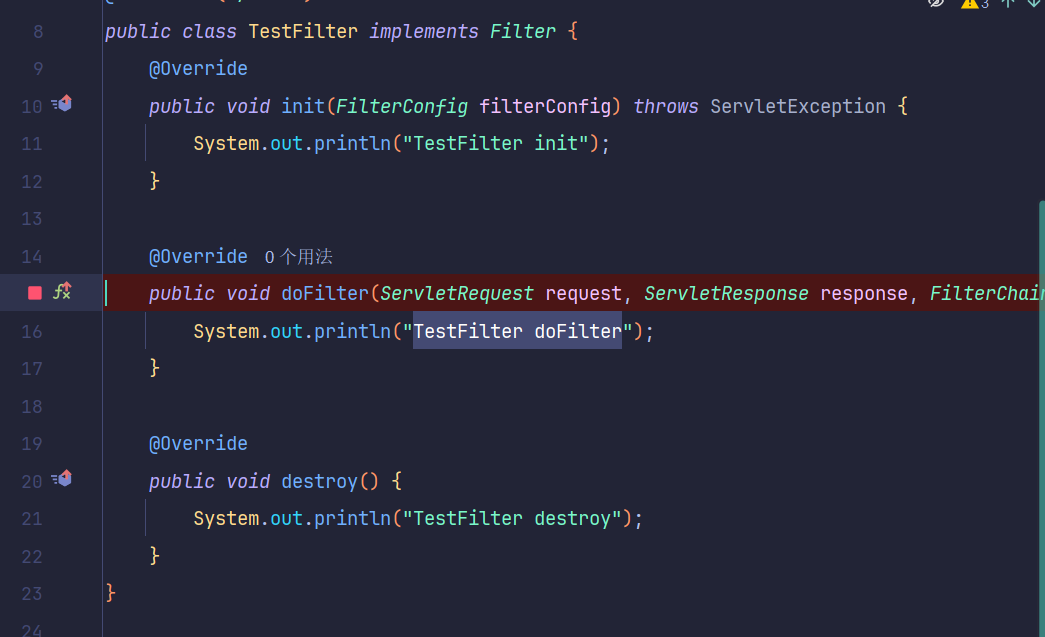
跟进org.apache.catalina.core.StandardWrapperValve#invoke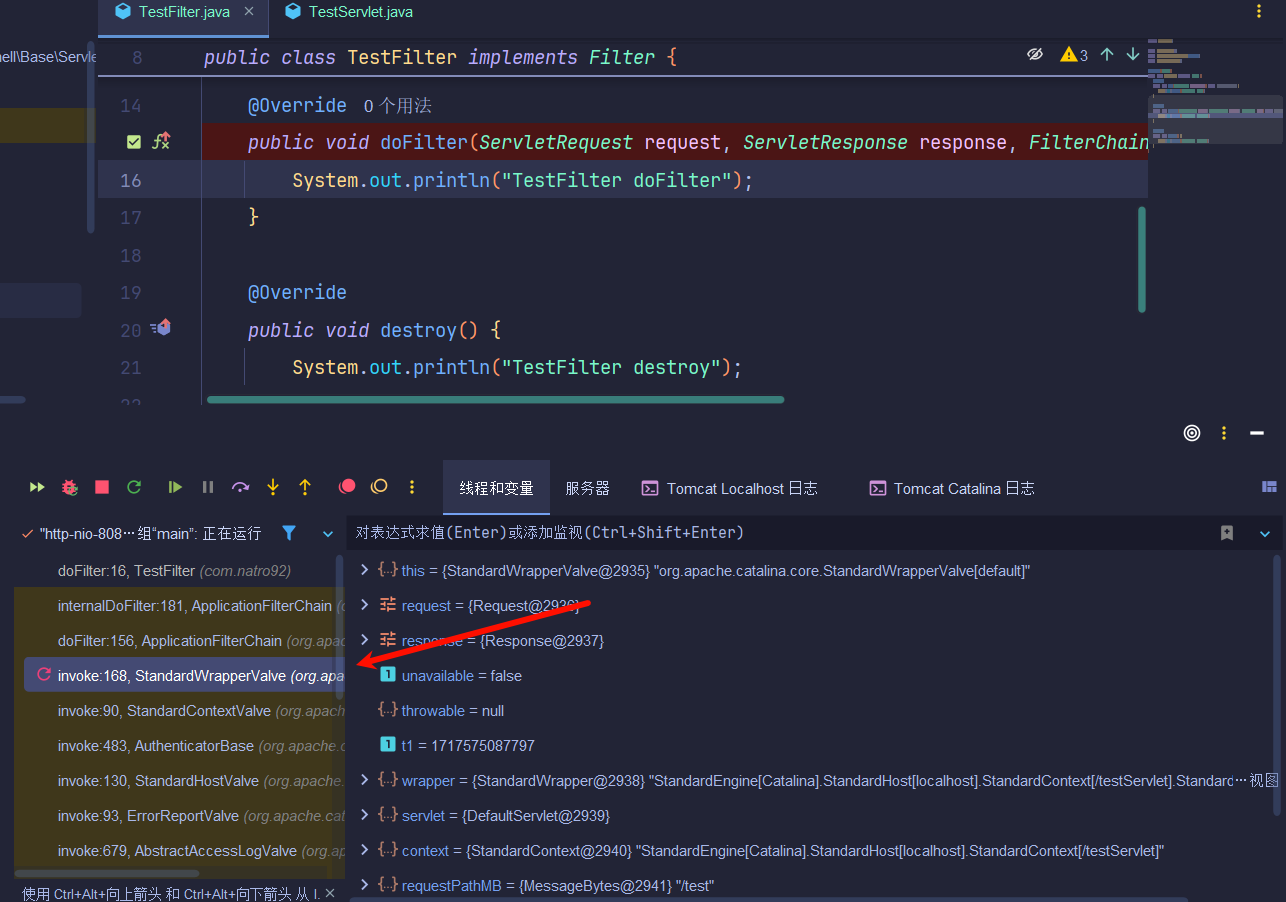
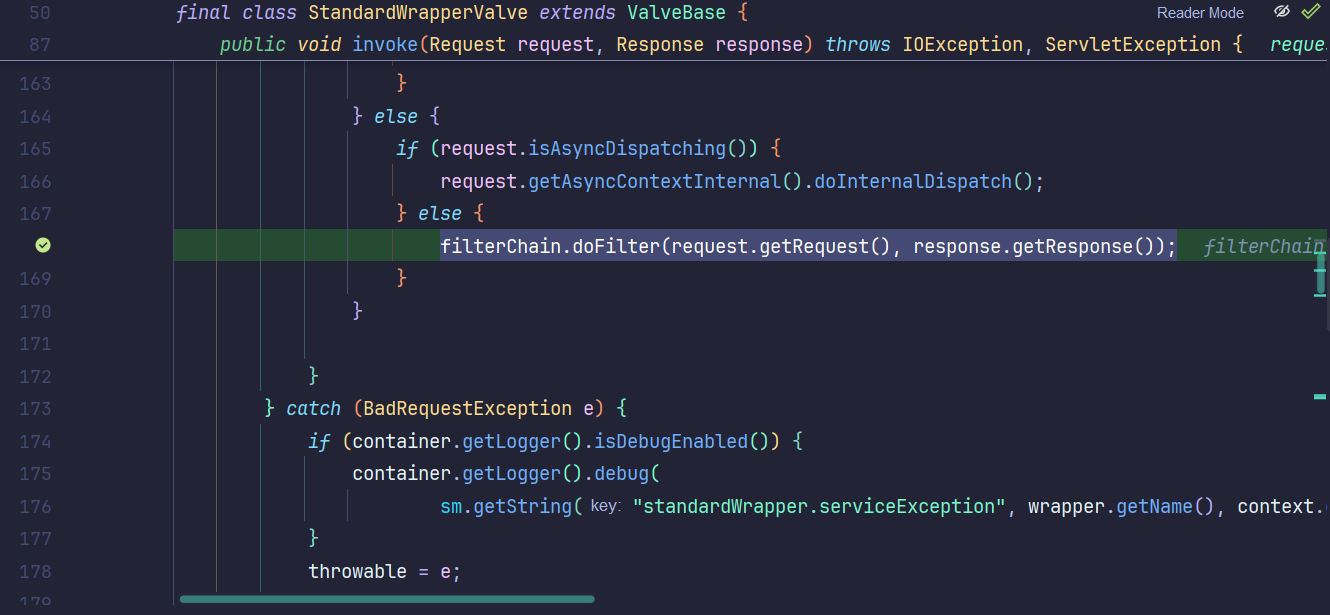
这里再次展示了FilterChain部分这里的结构:
下面这段代码中有两次出现,我们直接查看168行部分的。
1 | filterChain.doFilter(request.getRequest(), response.getResponse()); |
其中的filterChain我们返回到前面实例化位置。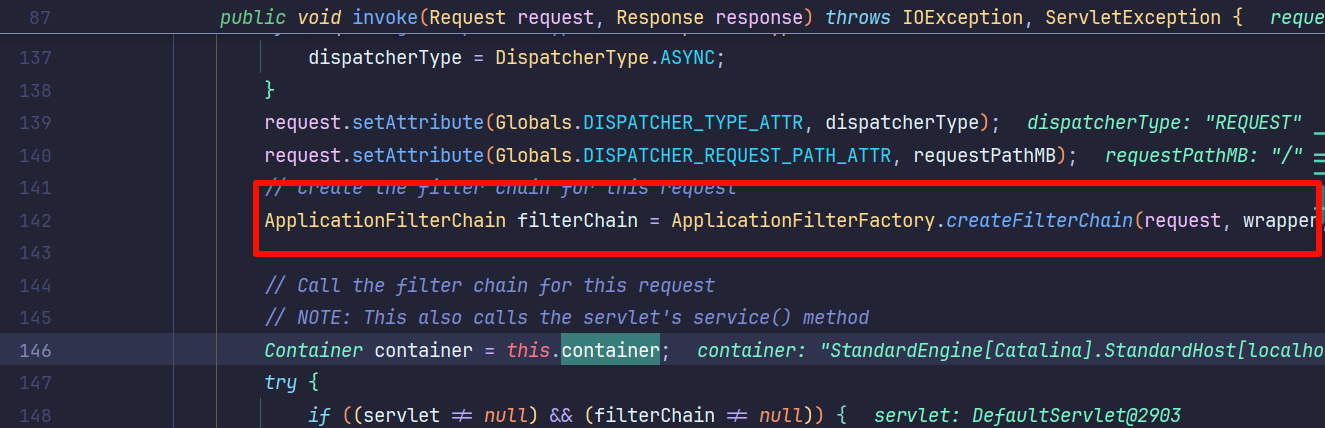
查看其中的createFilterChain方法:
1 | public static ApplicationFilterChain createFilterChain(ServletRequest request, Wrapper wrapper, Servlet servlet) { |
上来先判断servlet是否为空。如果不为空继续下去,根据ServletRequest如果是Request类型,并且开启了IS_SECURITY_ENABLED,则创建新的ApplicationFilterChain,否则尝试获取已有的ApplicationFilterChain(不存在就创建新的)。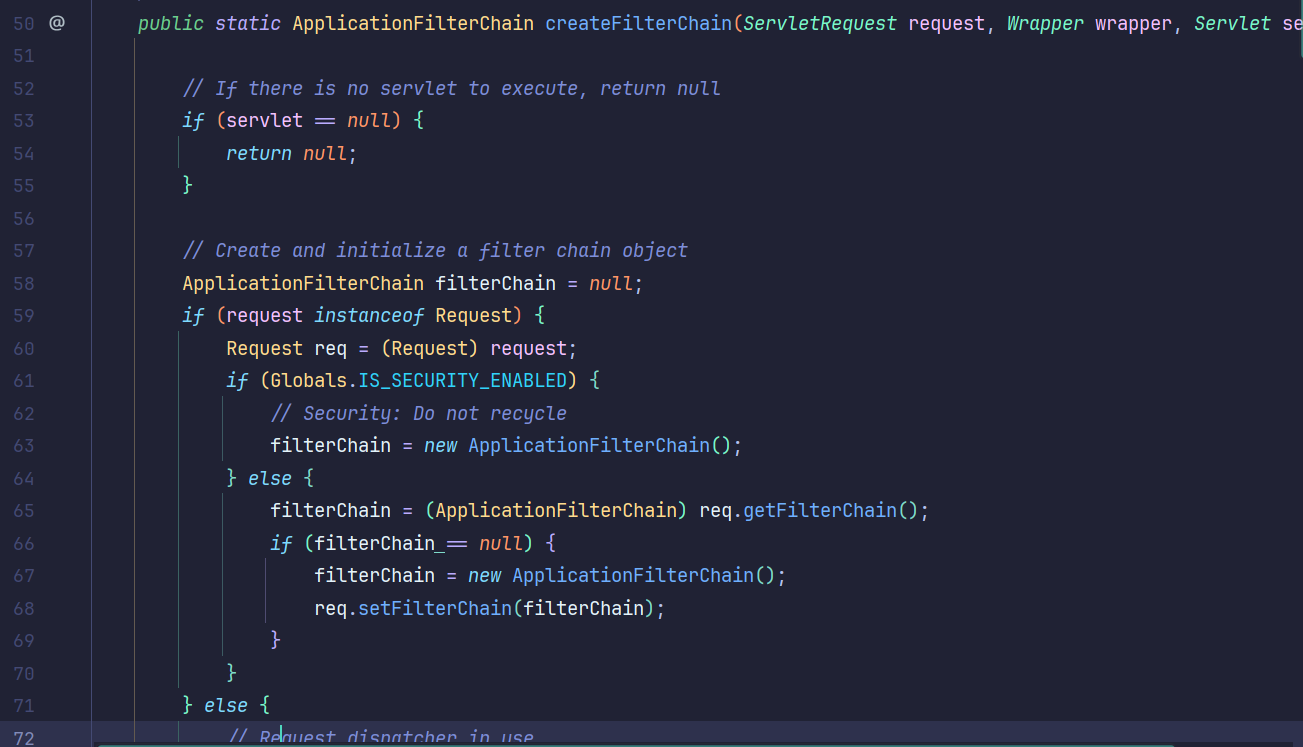
设置Servlet和ServletSupportsAsync属性。从Wrapper中获取父级上下文StandardContext,然后获取filterMaps,遍历获取然后根据DispatcherType,将匹配的过滤器添加到FilterChain,最终返回创建或者更新后的FilterChain。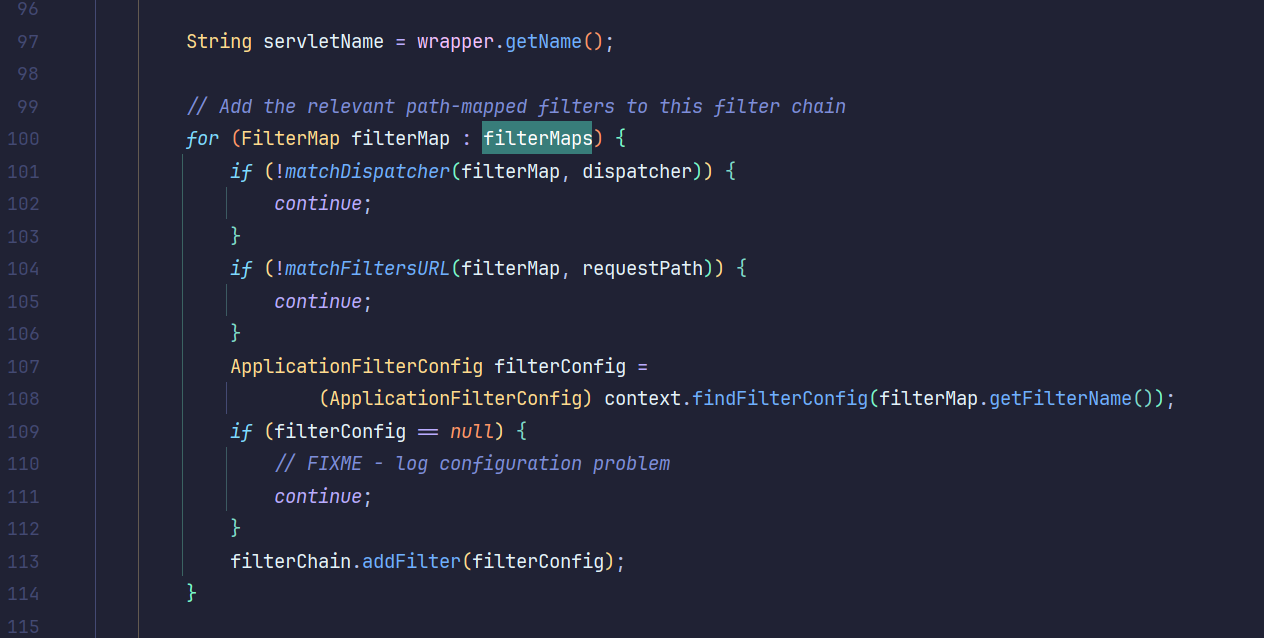
从filterChain.doFilter()进去到org.apache.catalina.core.ApplicationFilterChain#doFilter处。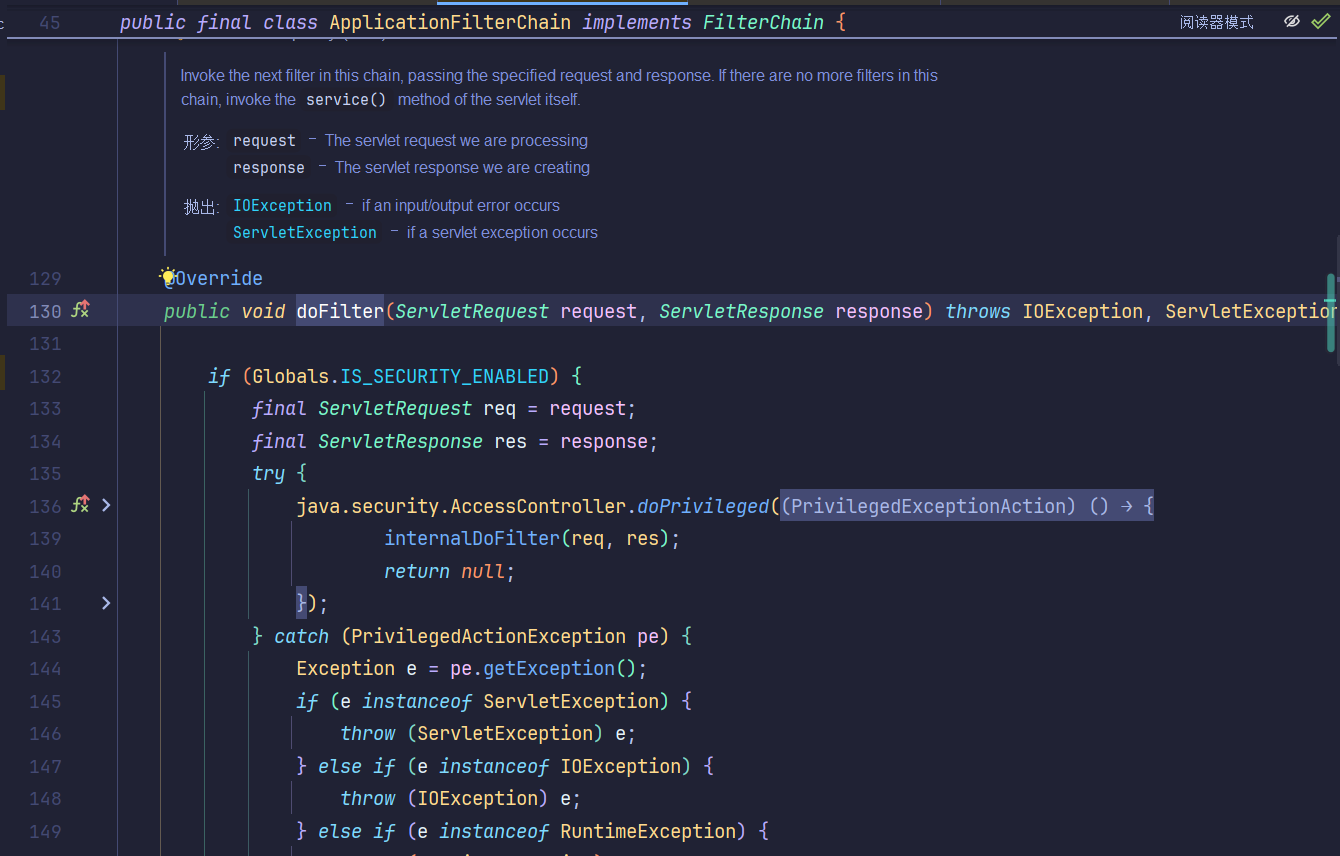
其中调用的internalDoFilter里面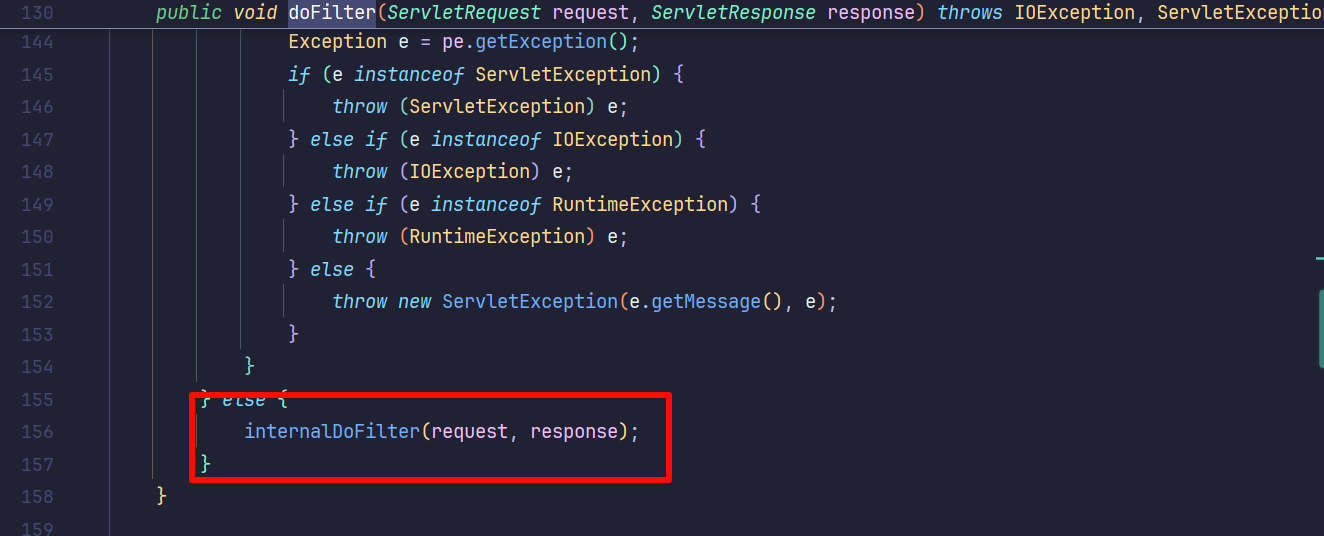
org.apache.catalina.core.ApplicationFilterChain#internalDoFilter拿到filterConfig和filter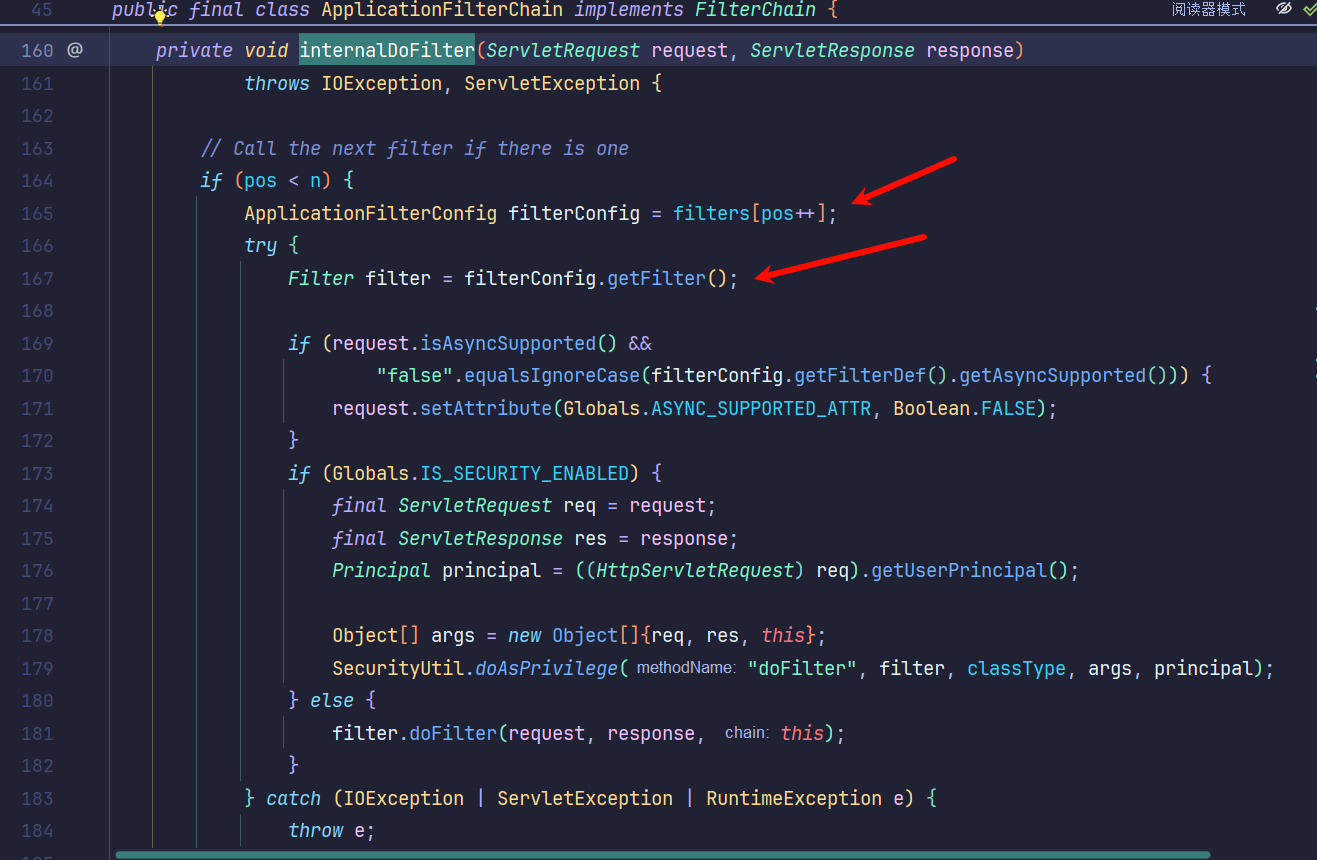
如果需要打入内存马,需要动态创建一个Filter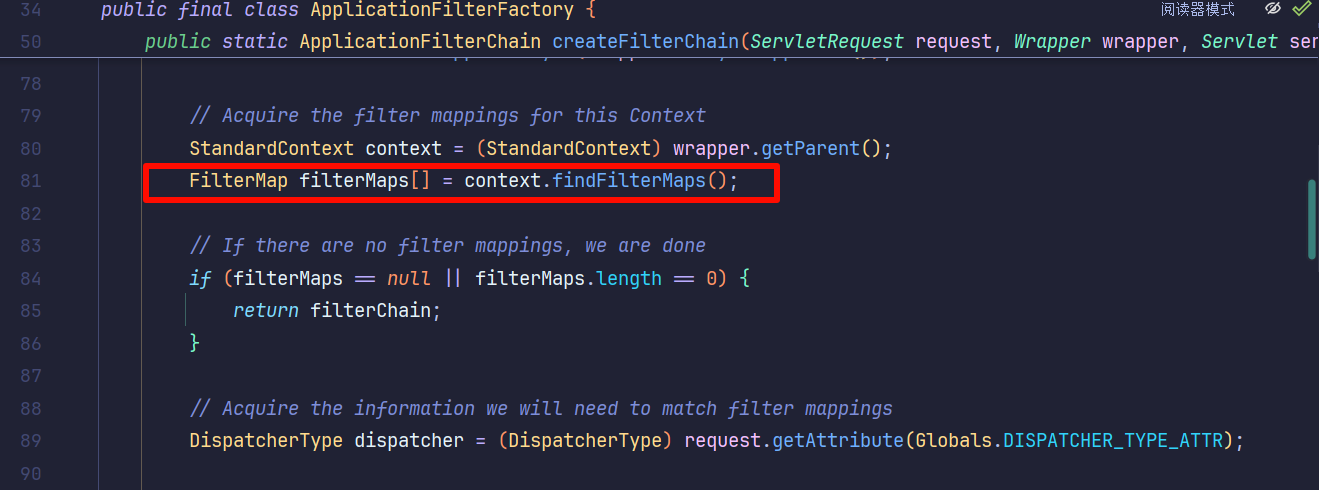
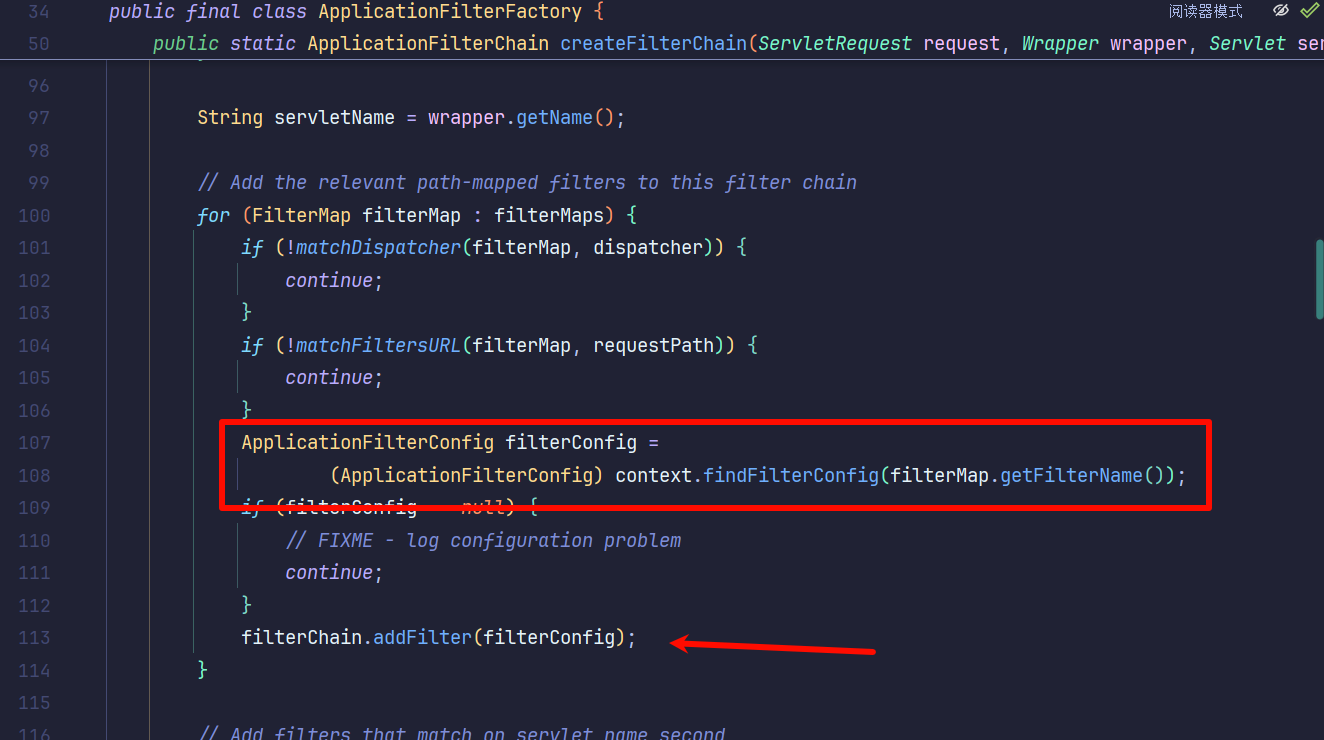
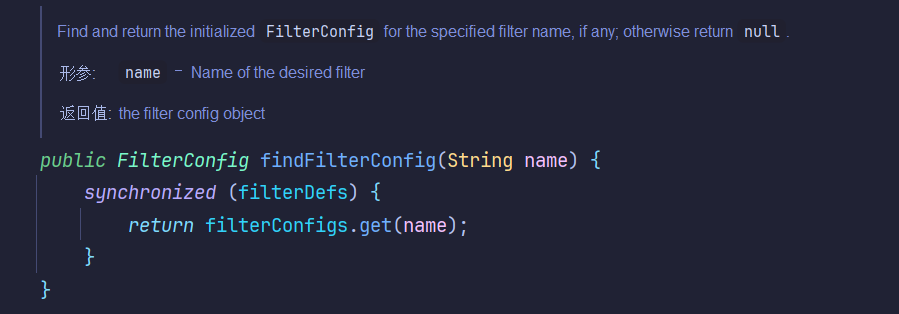
这里的org.apache.catalina.core.StandardContext#findFilterMaps和org.apache.catalina.core.StandardContext#findFilterConfig实现代码: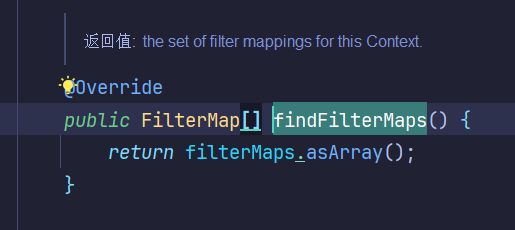
找到现有的上下文,然后插入自定义的恶意过滤器映射和过滤器配置,实现动态添加过滤器。也就是如何添加filterMap和filterConfig。
而org.apache.catalina.core.StandardContext#addFilterMap和org.apache.catalina.core.StandardContext#addFilterMapBefore可以从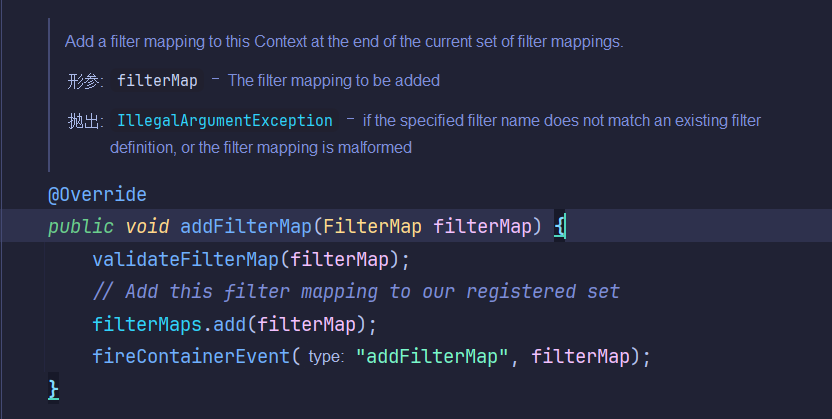
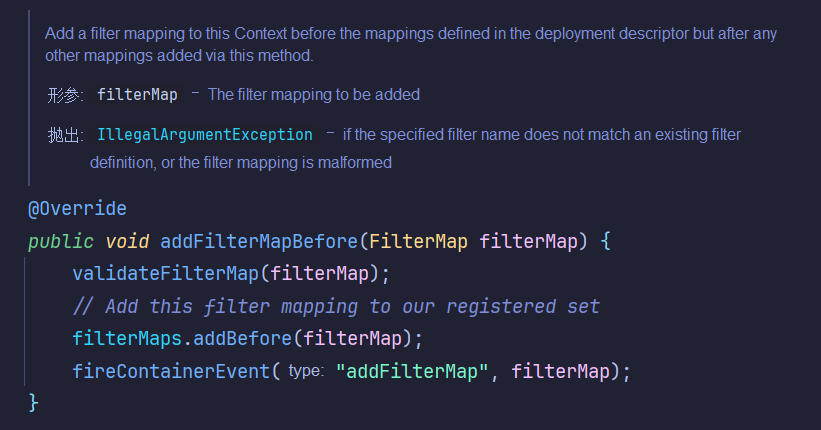
这两个前者可以将一个新filter添加到当前filter映射的最后;而后者可以将一个filter移动到最先。
进入到二者最先调用的方法org.apache.catalina.core.StandardContext#validateFilterMap。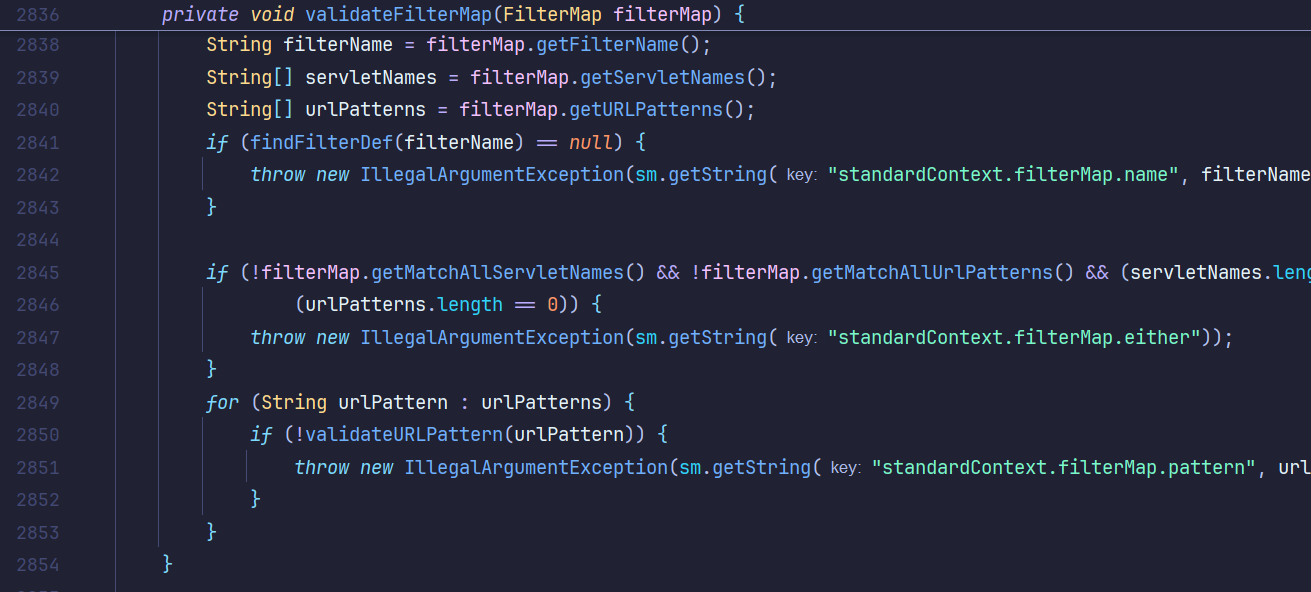
这里显示再根据通过filterName查找FilterDef时,需要不报错,也就是存在,就需要自定义一个filterDef并加入filterDefs,可以使用org.apache.catalina.core.StandardContext#addFilterDef实现。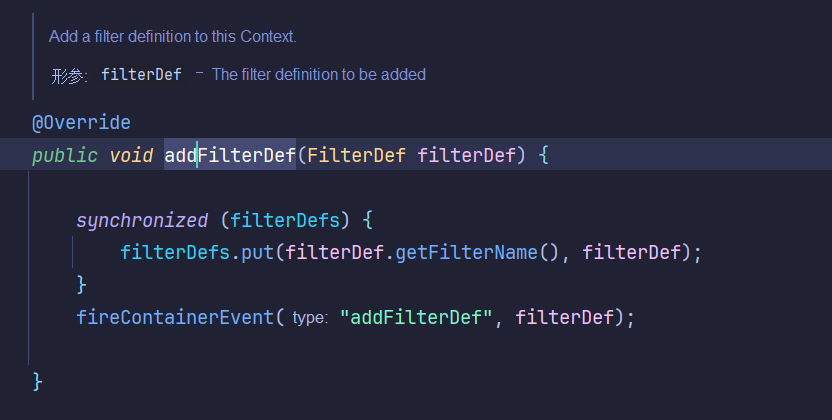
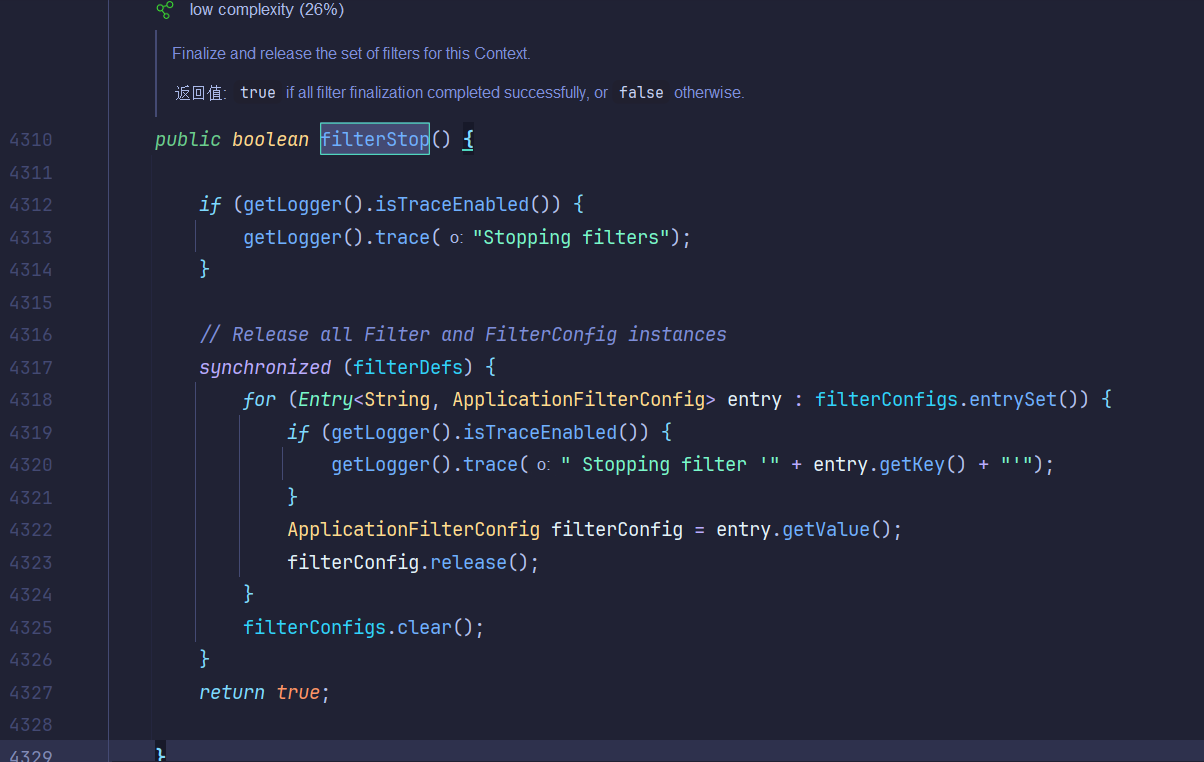
但是现在没有添加filterConfig的方法,只有filterStart和filterStop这两个方法。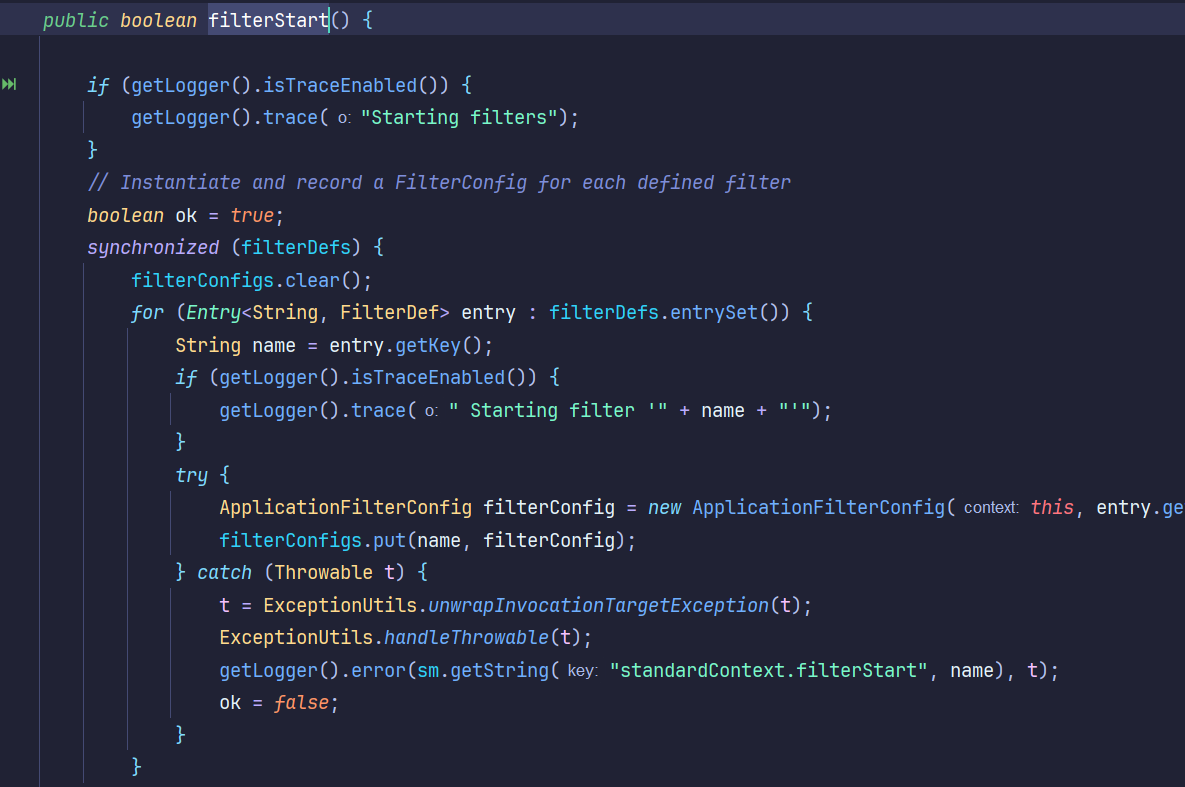
可以使用反射来获取并添加属性。
Listener
Listener作为最先被加载的,因此也可以形成一种内存马。
常见Listener:
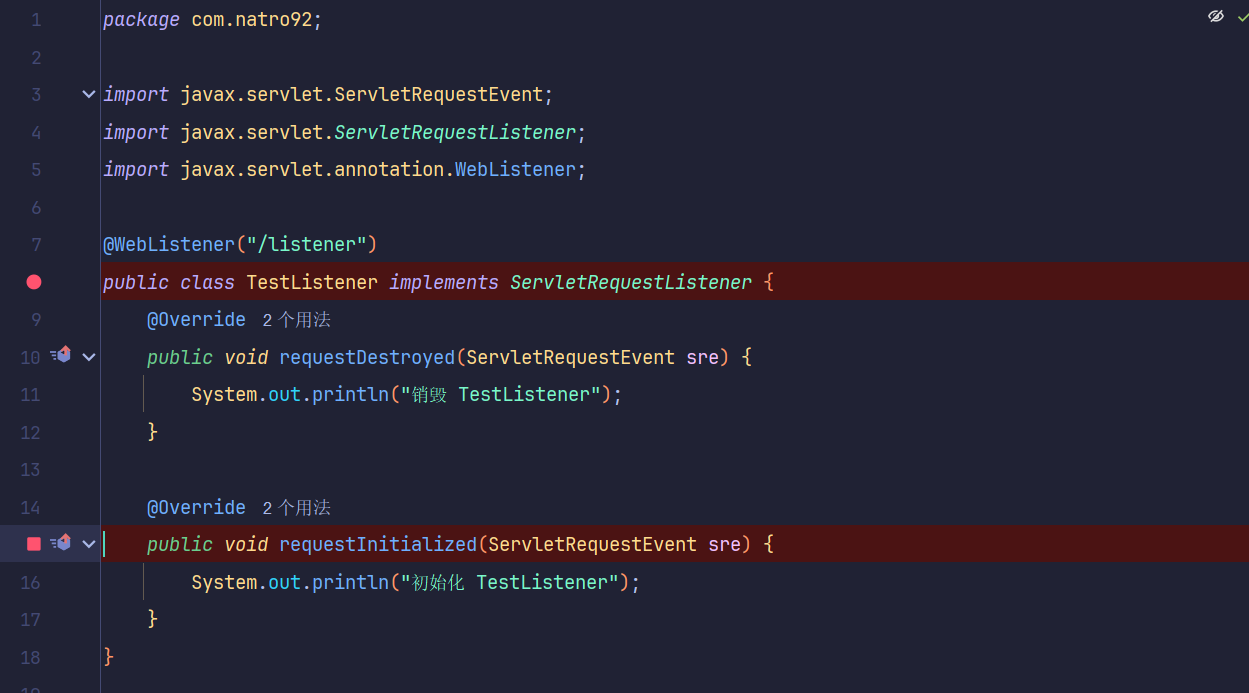
ServletContextListener,用来监听整个Web应用程序的启动和关闭事件,需要实现contextInitialized和contextDestroyed这两个方法;ServletRequestListener,用来监听HTTP请求的创建和销毁事件,需要实现requestInitialized和requestDestroyed这两个方法;HttpSessionListener,用来监听HTTP会话的创建和销毁事件,需要实现sessionCreated和sessionDestroyed这两个方法;HttpSessionAttributeListener,监听HTTP会话属性的添加、删除和替换事件,需要实现attributeAdded、attributeRemoved和attributeReplaced这三个方法。
很明显,ServletRequestListener是最适合做内存马的,因为它只要访问服务就能触发操作。
简单实现
继续使用上一个项目。
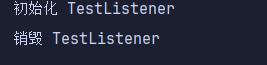
1 | package com.natro92; |
流程分析
断点调试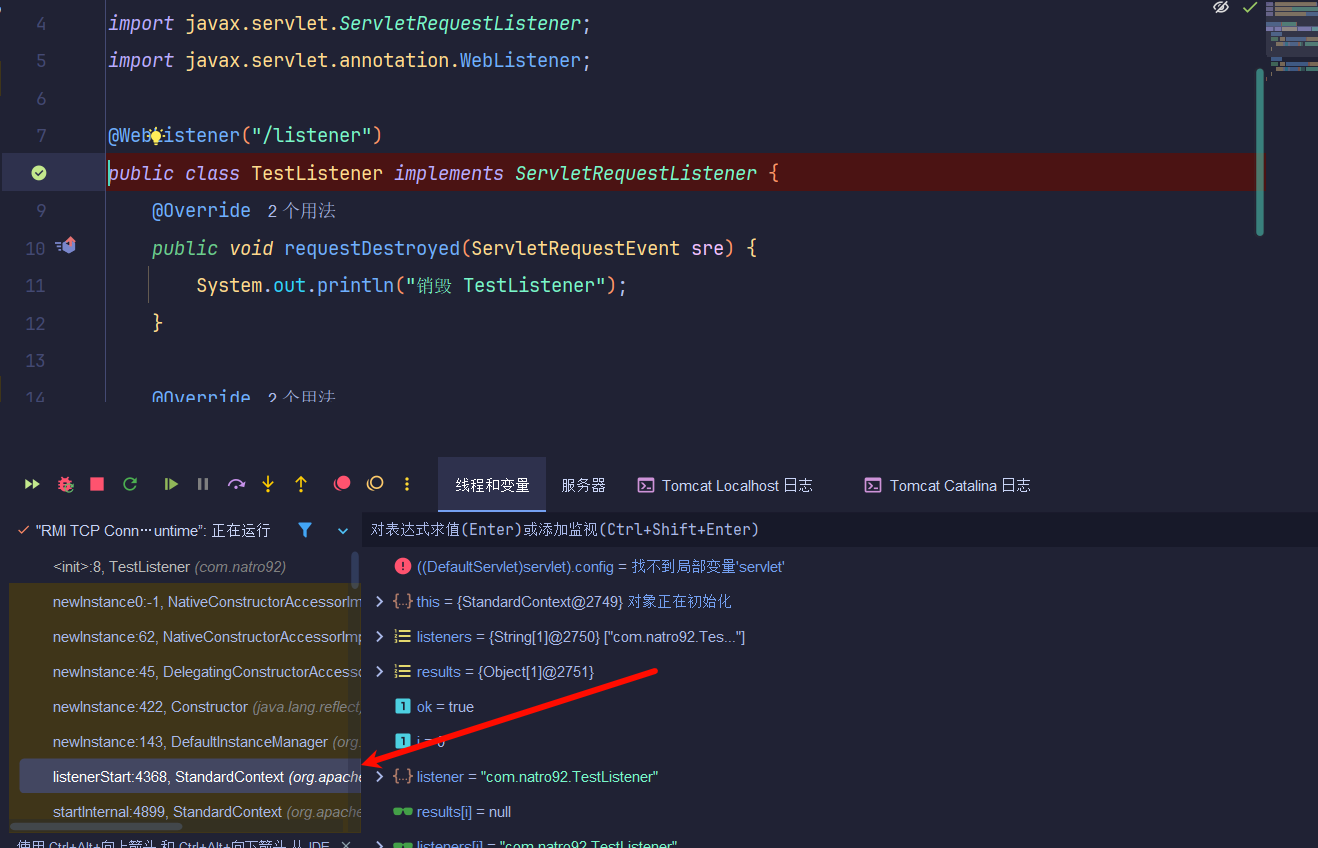
进入org.apache.catalina.core.StandardContext#listenerStart先通过findApplicationListener,然后实例化这些获取到的listener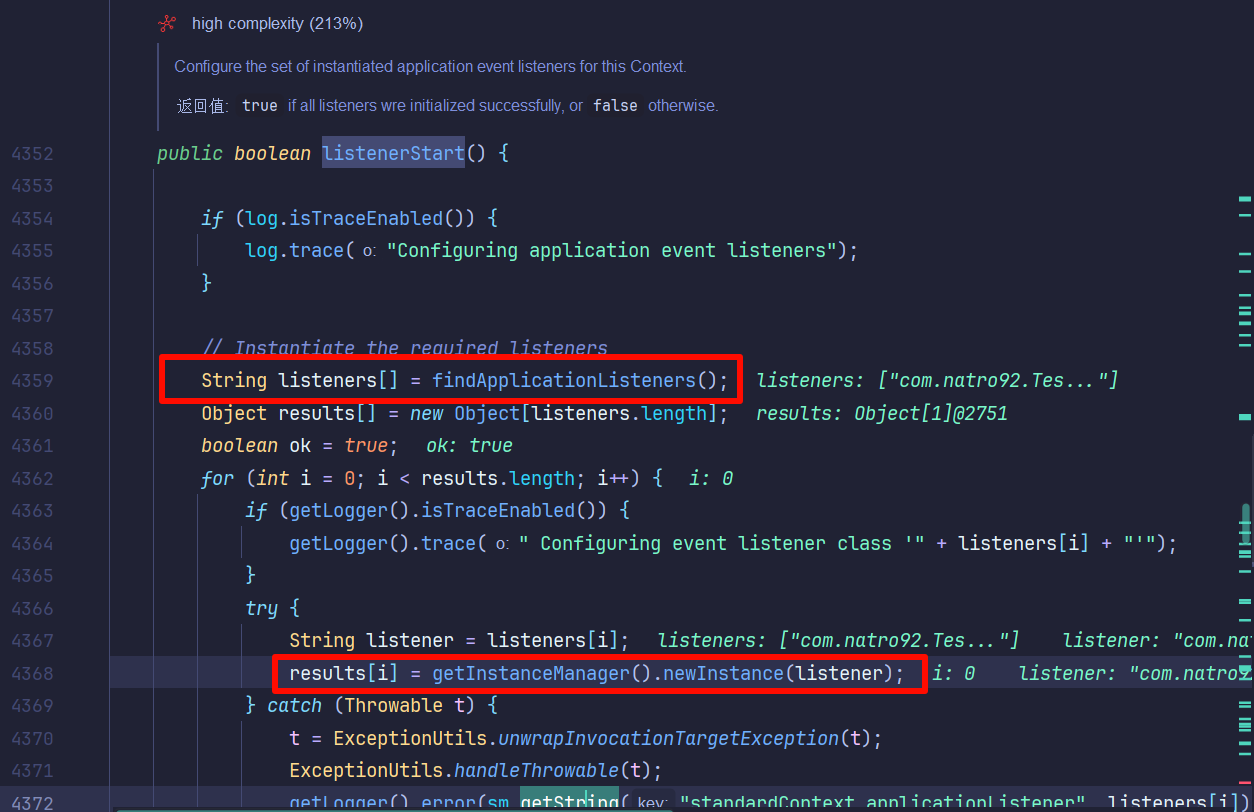
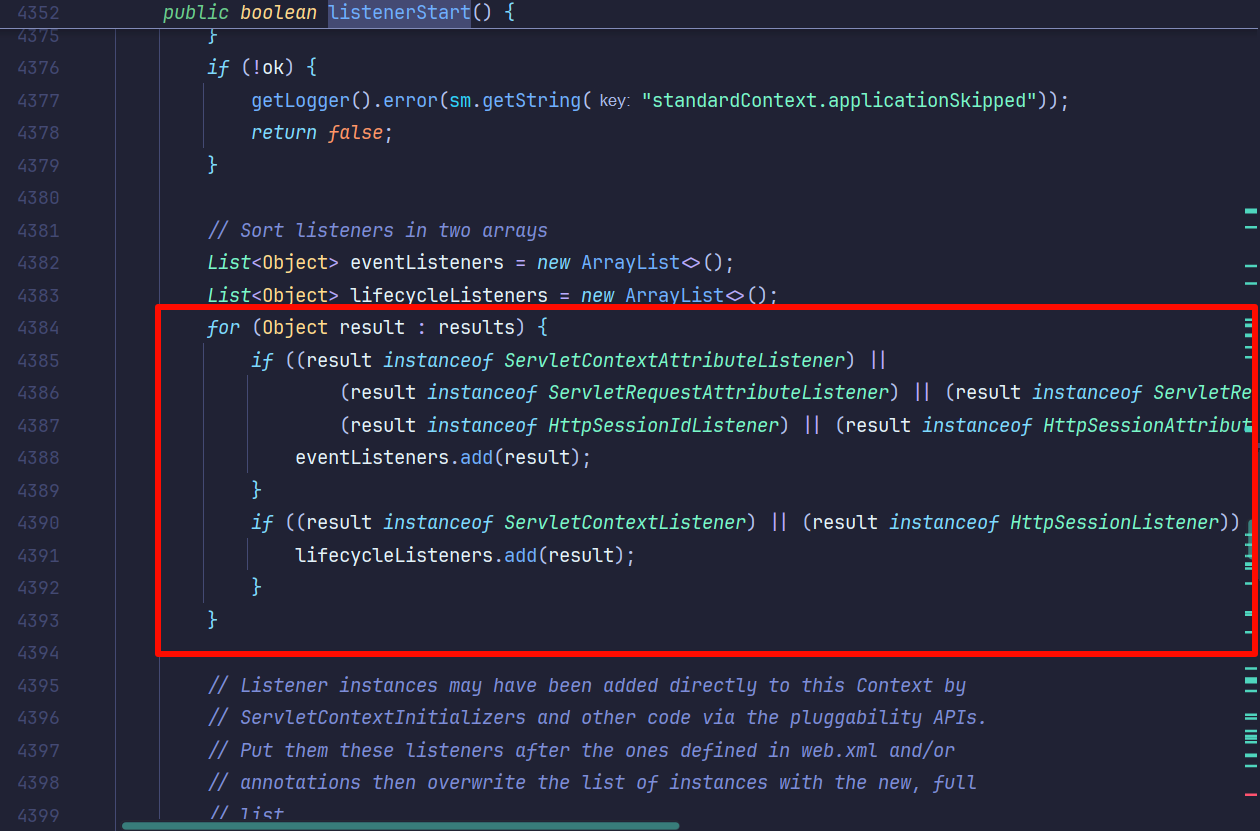
将ServletRequestListener被放在了eventListener。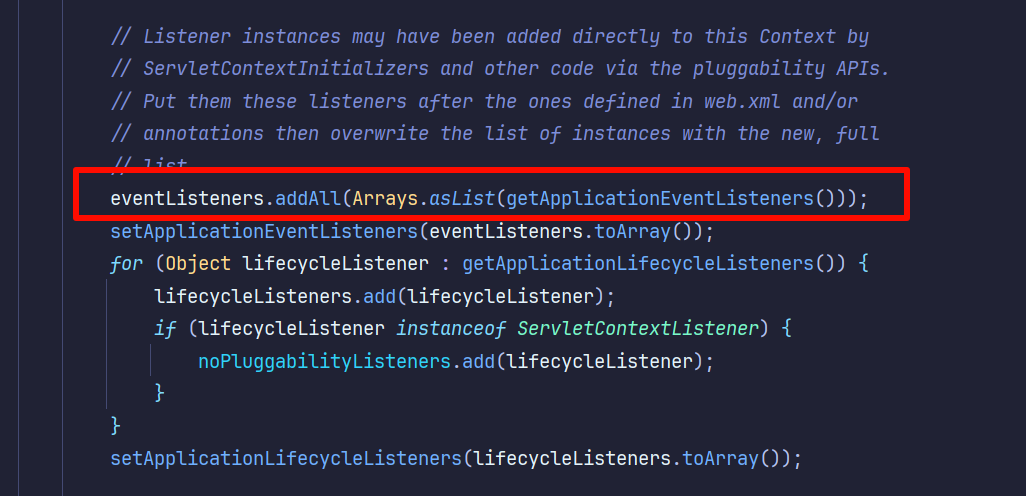
通过org.apache.catalina.core.StandardContext#getApplicationEventListeners使用addAll方法加入eventListener中。
也就是将Listener的列表转换为数组返回。Listener有两个来源,一是根据web.xml文件或者@WebListener注解实例化得到的Listener;二是applicationEventListenersList中的Listener。
可以通过使用org.apache.catalina.core.StandardContext#addApplicationEventListener为其添加listener。
后记
这个讲的确实零基础还细,很多讲的点都深入了。